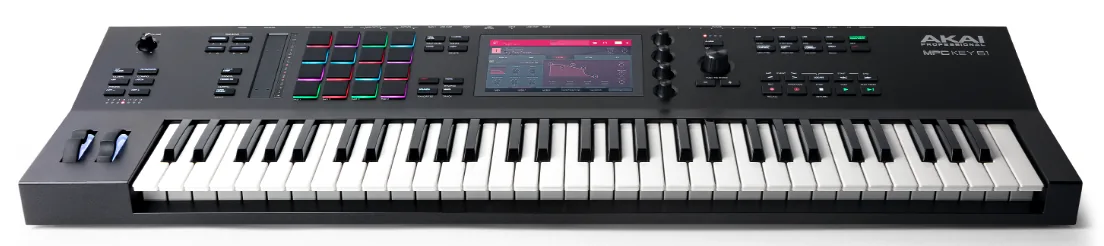
How to use this manual
It’s easy to end up with more instruments and effects than you actually know how to use—accumulated one purchase, bundle, or sale at a time. This manual exists to close that gap: a consolidated view of what everything does, and a structured path through it. It isn’t a beginner’s introduction to production, and it isn’t a tour of every menu either—it’s a working system for turning a pile of capability into muscle memory.
Use it in three passes:
- Learn the shared models first. Signal flow, modulation, timing, stereo, and commitment explain most plugins. Learn those ideas once.
- Run the drills. Each processor becomes useful only when you can predict it, level-match it, and choose it instead of a similar tool.
- Finish music. A capability becomes useful when it works inside a complete beat—not when you have only watched a walkthrough.
Setup overview
The underlying system—signal flow, chain logic, sampling workflow, storage, and the curriculum—isn’t specific to one MPC. It’s built around a Key 61, so hardware-only sections (keys, pads, CV/Gate) are labeled separately; everything else should translate to any standalone MPC. The instruments and effects below reflect one collection built up over time, not a required kit—skip or substitute whatever you don’t own.
| Layer | What you have |
|---|---|
| Main workstation | MPC Key 61 running MPC OS 3.9.1 or a later compatible version. |
| Idea pad | MPC Sample for quick sketches, optional. |
| Instruments covered | Mini D, Jura, Sub Factory, Analog Dreams, Cloud Supply, Homage, Nacht, and Sway. Skip any instrument you do not own. |
| Effects covered | AIR Flavor Pro, AIR Ether, AIR Sprite, Flex Beat, AIR Jura Chorus, AIR Soft Clipper, AIR Multiband Filterbank, AIR Stereophonic Enhancer, AIR Visual EQ4, AIR Utility, AIR Reverb Pro, AIR Stereophonic EQP, AIR Tape Double Track, AIR Tape Echo, AIR Tape Saturator, and Lo-Fly Dirt. Substitute a similar effect when needed. |
| Optional features | Super Warp Algorithm, Advanced Q-Links, Advanced CV, Clip Launch, and MPC Stem Separation. These require the appropriate software or expansion. |
| Storage | An external SSD, USB drive, or the Key 61’s internal storage for projects, samples, and exports. |
Optional instrument: Fabric Select may be included with MPC Pro Pack. On the Key 61, create a Plugin track and look under MPC Plugins → AIR Music Technology, then check Sounds. If it is unavailable, use another layered instrument for the same exercise. Pro Pack instruments and features may require separate installation or activation.
Desktop boundary: MPC 3 Desktop is a beta companion to the standalone Key 61 workflow. It supports AU and VST3 plugins, but some Key 61 features—including Super Warp and Clip Launch—may be standalone-only or unavailable in the desktop beta. The four plugins included with MPC Pro Pack are MPC3-only rather than VST/AU/AAX builds. Use standalone mode for the most complete feature set.
1. The whole system in one picture
The Key 61 is a complete production environment on its own: capture, develop, perform, and finish, all in one box. If you also own an MPC Sample, it plugs in as an optional idea pad—an upstream capture step whose sketches move forward into the Key 61, never the reverse:
flowchart TD
    S["Optional: MPC Sample idea pad"] -.-> T["microSD / USB transfer"]
    T -.-> A["MPC Key 61: capture, develop, and perform"]
    A --> D["MPC 3 Desktop Beta: detailed editing"]
    A --> E["SSD project archive"]
    D --> E
    E --> F["Stems / mix / reusable programs"]
The dotted path is optional and one-directional. An MPC Sample project can open on MPC hardware or software running version 3.8 or later, but a full MPC 3 project should not be exported back to MPC Sample. If you skip MPC Sample entirely, start directly at the Key 61 node—nothing downstream changes.
The four production postures
| Posture | Primary surface | What you decide | Finish the posture by |
|---|---|---|---|
| Capture | MPC Sample, Key 61 sampler, live inputs | Is the source worth keeping? | Naming and saving a clean source plus a rough musical use |
| Compose | Pads, keys, sequences, clips | What is the groove, harmony, and emotional center? | A 16–32 bar statement with variation |
| Develop | Key 61 arranger or Desktop Beta arranger where supported | What changes, enters, leaves, and returns? | A beginning, escalation, contrast, and ending |
| Commit | Resampling, audio tracks, mixdown, stems | Which decisions are now part of the sound? | A self-contained project and versioned exports |
The key habit: move forward by creating artifacts. At each handoff, leave behind a named sample, program, sequence, preset, printed performance, stem, or mix.
2. Signal processing: learn this once
Every effect named in this manual is some combination of six operations:
- Level: gain, peak control, dynamics, clipping.
- Spectrum: filtering, equalization, harmonic generation.
- Time: delay, echo, reverb, granular or rhythmic rearrangement.
- Pitch: tuning, chorus, wow/flutter, double tracking.
- Stereo: pan, width, mid/side balance, phase relationship.
- Control: automation, LFOs, envelope followers, macros, Q-Links.
If you can identify which of those six changed, you can diagnose almost any preset.
2.1 Serial, parallel, and printed processing
| Form | Signal behavior | Best use in your setup | Typical mistake |
|---|---|---|---|
| Insert | 100% of the track passes through the chain in order | EQ, Utility, saturation, clipping, signature sound design | Adding six processors when one source edit would work |
| Send/return | A copy is blended with the dry source | Shared Reverb Pro, Tape Echo, parallel dirt | Leaving low end and transients uncontrolled in the return |
| Submix/bus | Several tracks meet before a shared processor | Drum glue, music-bus tone, vocal group, live-instrument group | Processing the bus before balances are stable |
| Resample/print | The result becomes new audio | Flex Beat performance edits, feedback throws, complex Sprite/Ether design, CPU relief | Destroying the only editable version |
Keep the editable source muted rather than deleted after printing. Name prints with the job: drums_tape_glue, flute_echo_throw, sample_flex_fill.
2.2 A default chain—and when to break it
flowchart LR
    A["Source"] --> B["Utility"] --> C["Corrective EQ"] --> D["Color / dynamics"] --> E["Movement"]
    E --> F["Space"] --> G["Bus / output"]
| Stage | Question | Your tools |
|---|---|---|
| Source | Can the sample, envelope, velocity, voicing, or synth patch solve it? | Sample/Track Edit, instrument controls |
| Utility | Is level, polarity, channel balance, or width sane? | AIR Utility |
| Corrective EQ | What exact obstruction must leave? | AIR Visual EQ4 |
| Color/dynamics | What identity or density should enter? | Tape Saturator, Flavor Pro, Lo-Fly Dirt, Soft Clipper, EQP |
| Movement | What should evolve or answer the rhythm? | Jura Chorus, Multiband Filterbank, Flex Beat, Sprite, Tape Double Track |
| Space | How near, far, dry, or atmospheric is it? | Reverb Pro, Ether, Tape Echo |
| Bus/output | Do the parts act like one record and translate? | submixes, Utility, EQP, Enhancer, conservative clipping |
Break the order deliberately:
- Reverb into dirt makes the room sound sampled or printed to an old medium.
- Dirt into reverb keeps the room cleaner than the source.
- Echo into filter darkens every repeat together; filter inside feedback changes each generation.
- Chorus before saturation lets moving partials excite the saturator; saturation before chorus widens an already stable tone.
- Clip before bus tone catches individual peaks; clip after bus tone also catches new peaks created by boosts.
2.3 Gain staging without superstition
There is no magic meter value that makes every beat sound right. The practical rule is to maintain enough headroom that processors react because you chose to drive them, not because the preceding stage accidentally overloaded.
Use this loop for every nonlinear plugin:
- Set the track at a useful balance.
- Insert the processor with its drive/intensity low.
- Increase until the character becomes obvious.
- Back down to the musical amount.
- Match bypass and processed loudness with output gain.
- Decide at low monitoring volume and inside the full arrangement.
If the processed version only wins when louder, it has not yet earned the slot.
2.4 Frequency jobs
| Region | Musical concern in your work | First moves |
|---|---|---|
| Sub | Kick/bass relationship and translation | Tune notes, shorten tails, choose which element owns the deepest octave; keep it mostly centered |
| Low-mid | Weight versus mud in samples, guitar, horns, keys | Arrangement first; broad cut or filtering only after identifying the collision |
| Midrange | Snare identity, vocals, melodic intelligibility | Protect the central statement; do not scoop everything |
| Presence | Attack, consonants, pick noise, horn bite | Use narrow correction only for pain; broad tone for intent |
| Air | Cymbal polish, breath, room, noise | Add cautiously; lo-fi processing may be better served by controlled loss |
2.5 Stereo and mono
Width is a contrast, not a quality score. A record feels wide because something else is centered.
- Center kick, sub, main snare, and the core vocal statement unless an arrangement says otherwise.
- Widen supporting keys, doubled guitar, ad-libs, textures, and selected percussion.
- Use AIR Utility to inspect mono and polarity before blaming EQ.
- Bass Mono in Tape Double Track is a safety tool, not permission to over-widen an 808.
- Mid/Side EQ changes what exists in the center versus the edges; it does not create a stable stereo recording from a phase-damaged source.
- Check mono after any chorus, double-tracking, enhancer, or extreme width move.
2.6 Automation, modulation, and performance
| Method | Best for | Character |
|---|---|---|
| Drawn automation | Exact mutes, corrective rides, repeatable transitions | Precise |
| Recorded Q-Link movement | Filter, sends, macros, feedback gestures | Human and phrase-aware |
| LFO | Repeating cyclic motion | Predictable but alive |
| Envelope follower | Motion caused by the incoming performance | Rhythmic and source-dependent |
| Flex Beat/pad performance | Fills, cuts, stutters, reverses | Gestural |
| Resampled pass | Complex or unstable movement worth keeping | Committed and unique |
Prefer one clear modulation destination with a constrained range to five destinations moving randomly.
2.7 The universal processor test
For every effect in Chapter 8, save these five tests:
- Minimum: the smallest setting you can reliably identify.
- Sweet spot: the setting that improves a real part in context.
- Edge: the point just before the source loses its role.
- Abuse: a deliberately extreme setting resampled as new material.
- Null job: a note explaining when the plugin should not be used.
That set becomes your personal manual.
3. MPC storage and file structure
Keep your existing sample and music library. This chapter is not a replacement taxonomy; it is a short map of the places MPC documents and the files that need to travel together.
3.1 Documented storage locations
On the Key 61, the internal drive is browsed on the device rather than mounted directly to a computer in controller mode. Akai documents these common locations:
Internal/
├── MPC Documents/              user files
│   └── Projects/               default user projects and project data
├── Expansions/
│   ├── The Vault 2/             factory samples and drum programs
│   └── Instruments/             factory instrument programs
├── Demos/                       factory demo projects
├── Synths/                      downloaded MPC plugin content
├── Splice/                      synced Splice samples, if used
└── Features/                    feature content, such as Stem Separation
The Browser’s Content buttons are shortcuts into these areas: Drums and Samples point into expansion content, Instruments filters instrument programs, Demos filters projects, and My Files opens MPC Documents. Folder contents can vary with installed content and MPC OS version.
For an external SSD, USB drive, or SD card, Akai recommends a root-level Projects/ folder for MPC projects. Your existing samples and music folders can remain alongside it; they do not need to be reorganized to match MPC’s factory folders.
3.2 Project and ProjectData structure
An MPC project is normally a project file plus a companion data folder:
Projects/
└── ProjectName/
    ├── ProjectName.xpj
    └── ProjectName_[ProjectData]/
        ├── samples, programs, and sequences used by the project
        └── other project-specific data
The .xpj stores project settings; the companion _[ProjectData] folder contains the sounds, programs, and sequences used by that project. Keep both in the same directory. If the Browser hides project-data folders, turn off Hide Project and Track data folders in Browser Options.
When moving or backing up a project, use Menu → Save → Project As to the destination drive, or copy the .xpj and its matching project-data folder together. Do not separate the pair.
3.3 Programs, samples, and plugin content
- Samples: save an individual sample with Menu → Save → Sample when you want a reusable file outside the current project.
- Programs: use Save Current Program for drum, keygroup, clip, plugin, MIDI, and CV programs. A separately saved program may still depend on its samples or plugin content.
- Project samples: samples saved with the project are normally kept in its
_[ProjectData]folder, which is why that folder travels with the.xpj. - Plugin content: MPC uses one
Synths/folder on the selected content-download drive. That drive must be connected when the hardware needs the content.
Program note: the standalone program file is typically .xpm. A separately saved program may still depend on its samples or plugin content, so saving a program is not a substitute for saving the project and its project-data folder.
For MPC 3 Desktop on macOS, Akai documents expansion content at /Library/Application Support/Akai/MPC 3/Expansions. MPC 2 uses /Library/Application Support/Akai/MPC/Expansions. These are software-content locations, not replacements for your own sample library.
3.4 Minimal workflow for an existing library
- Leave your current sample and music folders where they are.
- Browse that drive from Browser → Places and load only what the project needs.
- Save the project to an external drive’s
Projects/folder so the.xpjand_[ProjectData]folder are created together. - Save reusable samples or programs separately only when they have earned a place in your library.
- Keep source, license/permission notes, and finished exports in whatever existing folders already make sense to you.
3.5 Portable-project rules
- Do not treat the Key 61’s internal drive as a backup; Gen 1 internal storage is not directly accessible from the computer in controller mode.
- Keep every
.xpjbeside its matching_[ProjectData]folder. - If a project uses plugin content or an external sample location, record that dependency and test the project from the destination drive.
- Use SD Card Access for MPC Sample transfers, and copy the project file plus its
[ProjectData]folder together. - Back up before deleting or moving factory, plugin, or project folders; eject external media properly.
Public references: Internal-drive guide, Browser guide, external-project backup guide, plugin-content guide, and desktop expansion locations.
Library check
Pick one existing sample, one existing program, and one current project. Locate each from MPC’s Browser, save a copy of the project to an external Projects/ folder, then reopen it from that drive. The result—not a new taxonomy—is the useful test.
4. Optional: MPC Sample as an idea pad
This chapter is for readers who also own an MPC Sample. It is not required Key 61 knowledge—if you don’t have one, skip ahead to Chapter 5. The MPC Sample’s strength is constraint: quick sampling, sequencing, pad/knob effects, an internal mic and speaker, USB-C sampling, portable battery operation, and a project format that moves forward into MPC 3.
4.1 What to exploit
The current Akai MPC Sample FAQ lists:
- Up to 128 samples and 128 sequences per project.
- One sample per pad.
- 28 Knob FX; one effect can target one pad, selected pads, or all pads, with knob movements recordable as automation.
- 16 Pad FX, with up to four active simultaneously and latch behavior.
- 16 Flex Beat effects, reached with Shift + Pad FX.
- Sampling from 1/4-inch inputs, internal mic, or USB-C.
- Project compatibility with MPC hardware/software running version 3.8 or later, including MPC 3 Desktop where supported.
4.2 The capture-small protocol
- Name the project before the session becomes important.
- Capture the source and immediately trim obvious dead space.
- Make a playable chop layout; do not perfect all slices.
- Record a two- or four-bar pocket.
- Add one alternate sequence: stripped, denser, or harmonically different.
- Record only the effect gestures that are part of the idea.
- Save to microSD with its ProjectData folder.
- Move the project to the SSD through the Mac, then open the
.XPJon the Key 61 or, where appropriate, MPC 3 Desktop Beta. Keep the original project and remember that the desktop build is beta software.
Do not burden the sketch with a full mix. Its job is to preserve source, pocket, and intent.
4.3 Expand on Key 61
Once opened in MPC 3 standalone on the Key 61, or in MPC 3 Desktop Beta where supported:
- Save As immediately into the project’s SSD folder; preserve the original MPC Sample project.
- Name pads and tracks before exploding or duplicating.
- Split the rough performance into musical roles: kick, snare, hats, percussion, sample phrases, texture.
- Preserve one untouched “Sample Original” track as a reference.
- Add live keys, bass, instruments, and return effects.
- Move from sequences to Song/Arranger only after at least two contrasting sections exist.
- Export separate tracks, submixes, and returns when you need a DAW handoff.
For desktop stem export, use File → Export → Audio Mixdown, then enable Separate Tracks, Export Submixes, and Export Returns.
4.4 A repeatable idea-pad exercise
Once a week, make a complete MPC Sample sketch under these limits:
- One source recording.
- Eight chops or fewer.
- Six drum sounds or fewer.
- Two sequences.
- One Knob FX automation pass.
- One Pad FX/Flex Beat fill.
- 25 minutes maximum.
Open it on the Key 61 the next day and finish a 90-second arrangement without replacing the central sample idea.
5. MPC OS 3.9.1 capability map
MPC 3’s one-to-one track workflow is the center of the system: each track has its own sound-source container. A project is a set of tracks plus multiple ways to structure time. The feature descriptions below are primarily for MPC 3.9.1 standalone; the MPC 3.9 Desktop build remains a public beta and does not have identical feature availability.
5.1 Track types
| Track | Use | Hip-hop role | Commit strategy |
|---|---|---|---|
| Drum | Samples or per-layer oscillators | Drums, chops, one-shots, phrases | Save the program; flatten/bounce heavy processing |
| Keygroup | Mapped samples or oscillators | Original instruments, sampled bass/keys, chromatic chops | Save with assets and reload-test |
| Plugin | Internal instrument | Bass, keys, pads, leads, textures | Print after sound and performance are stable |
| Audio | Recorded/imported timeline audio | Vocals, guitar, horns, flute, live bass/drums, long samples | Preserve original takes; comp/edit copies |
| MIDI | External or software destination | Sequence synths/modules/DAW instruments | Record a safety audio pass |
| CV | Control voltage destination | Modular/CV control | Requires appropriate CV-capable routing |
5.2 Timeline choices
| Tool | Think of it as | Choose it when |
|---|---|---|
| Sequence | A reusable section | Verse, chorus, bridge, alternate pocket |
| Next Sequence | A live section conductor | Testing form and spontaneous order |
| Song | An ordered list of sections | Committing conventional form quickly |
| Arranger | A linear production timeline | Editing the complete narrative and long audio |
| Clip Launch | A nonlinear scene matrix | Improvising combinations, follow actions, performance |
Use sequences while discovering what the sections are. Use the Arranger when deciding exactly when events happen across the whole song.
5.3 Sampling and sound design
Master these as separate representations of audio:
- Audio region: best for long performances and timeline edits.
- Drum program: best for discrete chops and finger performance.
- Keygroup: best for chromatic/velocity-mapped playability.
- Clip: best for synced nonlinear launching.
- Resample: best for turning a performance or effect chain into new source material.
- Auto Sampler: best for absorbing a hardware/software patch into standalone.
MPC 3.9 allows layers in Drum and Keygroup tracks to use oscillator sources instead of samples. Available sources include Warm Sine, Digital Sine, Saw Square, Digital Saw, Pulse, Noise, FM2, RM3, Algorithmic Waveforms, Single Cycle, and Wavetable; some require the separate MPC Oscillator Content. This makes the sampler architecture a synth architecture.
5.4 Timing and feel
For your taste, groove should be performed, then edited selectively.
- Record kick/snare and sample gestures by hand before opening the grid.
- Use Time Correct selectively by event type; do not impose one strength on everything.
- Move a snare behind the grid for drag, but judge it against the bass and sample attack.
- Use velocity to shape the sentence, not to simulate randomness.
- Humanize can vary timing, length, and velocity; apply it to selected events and keep amounts small enough that intent survives.
- Let live hats, guitar scratches, percussion, and keys provide micro-variation rather than forcing every element into “Dilla timing.”
Three-pocket drill: create the same eight-bar idea as (1) tight and dry, (2) gently swung, and (3) intentionally lopsided. Do not label the third “better” until it still feels right after a day away.
5.5 Pro features
Super Warp Algorithm
An FFT-based standalone-only warp/pitch algorithm intended for demanding time changes. Akai’s current Pro Pack documentation says it is not available in MPC 3 Desktop because that build uses Elastique Pro. On the Key 61, use Super for harmonic loops, vocals, or tempo adaptation where standard warp reveals too many artifacts. It costs CPU: compare against unwarped chops, disable warp when unnecessary, and print decisions.
Drill: test drum, harmonic, and vocal material at 75%, 100%, and 130% tempo plus −5 and +7 semitones. Save one transparent and one beautifully broken result from each source class.
Advanced Q-Links
Adds LFO and envelope-follower modulation sources. The useful idea is cause and range:
- LFO → slow filter movement on a pad or texture.
- Envelope follower → reverb/delay amount that reacts to a vocal or percussion envelope.
- Narrow range → life; huge range → effect demonstration.
Create named performance banks: TONE, SPACE, RHYTHM, DESTRUCTION. Each Q-Link should have a safe minimum, expressive maximum, and neutral reset point.
Advanced CV
Provides four envelopes, four LFOs, phase reset, a stepper, and CV utilities. It becomes musically active only when routed to suitable CV-capable hardware/interface paths. If no such gear is connected, learn the page and signal logic but do not spend weeks mastering an unused physical workflow.
Clip Launch
On standalone MPC 3, build scenes by function: INTRO, POCKET, LIFT, BREAK, EXIT. Use follow actions for one predictable evolution and leave another moment manual. Capture a performance, then edit the resulting arrangement; do not expect the matrix itself to tell the song’s story. Akai currently says Clip Launch is unavailable in MPC 3 Desktop Beta, so do not assume this workflow exists there.
MPC Stem Separation
Treat separated drums, bass, vocals, and “other” as new source material, not perfect forensic isolation. Artifacts often become musical after filtering, chopping, layering, reversing, or resampling. Separation does not by itself grant permission to release material; check the applicable license and law for copyrighted recordings.
6. Reference styles, translated into decisions
These are illustrative reference points, not a required list—swap in whatever records you actually love. The goal is translating a broad style into concrete MPC decisions, not exhaustive biographies, artist endorsement, or copying a living or historic artist’s exact signature.
| Reference artist | Study this | MPC decisions |
|---|---|---|
| J Dilla | Elastic microtiming, conversational drums, sample/bass ambiguity | Perform first; shift only chosen notes; vary lengths; let kick, snare, hats, and sample imply different grids |
| Q-Tip / A Tribe Called Quest | Jazz/soul source selection, warmth, negative space | Fewer chops, stronger conversation between bass and sample, broad tone over surgical hype |
| DJ Premier | Declarative chops, hard drum punctuation, scratches/turnarounds | One-shot phrase architecture, intentional silence, sharp hook identity, filtered source variants |
| Dr. Dre | Separation, low-end authority, arrangement clarity | Clean track roles, mono-compatible bass, selective width, polished live/synth layers, disciplined muting |
| Easy Mo Bee | Swinging drums, soulful low end, characterful sample placement | Perform kick/snare interaction; avoid over-cleaning; use grit in parallel |
| Dungeon Family / Organized Noize | Live Southern musicianship, funk, strange detail | Record bass/guitar/horns, preserve performance, layer synthetic sub with live tone, use ear-candy sparingly |
| Scott Storch | Keyboard-led motifs, countermelody, dramatic arrangement | Use Key 61 as compositional center; write motif/countermotif; automate entries rather than stack continuously |
| Sa-Ra Creative Partners | Cosmic synth color, loose funk, unusual harmony | Jura/Analog Dreams/Sway layers, envelope movement, creative resampling, imperfect live interplay |
| DJ Muggs | Dark repetition, atmosphere, threatening space | Sparse minor material, Nacht/Ether textures, filtered drums, long-tail effects only at structural moments |
| The Roots | Human rhythm section, dynamic development | Capture full takes, edit lightly, let drums/bass breathe, automate ensemble depth rather than grid perfection |
| Hieroglyphics / A-Plus | Dense but nimble sample collage, melodic ingenuity | Small phrase fragments, contrasting registers, unusual loop boundaries, crisp drums and precise transitions |
Seven beat blueprints
1. Elastic soul pocket
- Start on MPC Sample with a two- or four-bar soul fragment.
- Make six to eight musical chops; retain breaths and pickups.
- Perform drums unquantized, then correct only obvious failures.
- Add live or Mini D bass that answers kick spaces instead of tracing roots continuously.
- Tape Saturator on the drum bus; Flavor Pro only on a parallel sample print.
2. Premier-style declarative flip
- Choose a phrase with a clear attack and harmonic identity.
- Build a new sentence from one-shot chops and silence.
- Duplicate the source program: full-band and filtered/telephone response.
- Use Tape Echo as a single end-of-phrase throw, not constant wallpaper.
- Create hook identity through arrangement, scratch-like gestures, or a transformed vocal fragment.
3. West Coast keyboard record
- Write a Mini D or Jura bass patch from near-init.
- Add a restrained main chord sound and one high countermelody.
- Center kick/sub; widen chorus keys or guitar above the bass region.
- Use Visual EQ4 for collisions, EQP for broad sweetness, Soft Clipper for measured drum peak control.
- Strip layers from verses so hooks can genuinely grow.
4. Dungeon Family live hybrid
- Capture bass or guitar first with a full performance.
- Build MPC drums around the player’s pocket, not vice versa.
- Add short horn responses and one flute/texture moment.
- Use Reverb Pro returns to place the ensemble in one world.
- Print a Sprite or Tape Echo pass for one surreal transition.
5. Dark cinematic loop
- Use Nacht or Cloud Supply for a sparse bed.
- Chop a minor-key source into an asymmetrical loop.
- Keep drums dry and close; let Ether occupy the background.
- Automate filtering or distortion once per section.
- Make the bass simple enough that atmosphere remains threatening rather than busy.
6. Roots-like ensemble
- Track live drums/percussion, bass, guitar/keys, and horn/flute in passes.
- Keep original audio takes; make comped copies.
- Align only the moments that break the ensemble, not every transient.
- Use shared short room and plate-like returns.
- Arrange through dynamics and orchestration before adding special effects.
7. A-Plus-style mosaic
- Collect three short source families: melodic, vocal, percussive.
- Put each in a distinct register and rhythmic role.
- Resample one combined phrase, chop it again, and create a second-generation program.
- Use Soft Clipper or Lo-Fly Dirt on selected drums, not the whole universe.
- Build surprising turnarounds at bars 4 and 8.
7. Instruments covered by this manual
The Key 61’s bundled instrument set includes Fabric XL, Stage Piano, Stage EP, Organ, OPX4, Odyssey, Hype, Studio Strings, Drumsynth, Mellotron, and Solina. This inventory is based on Akai’s Key 61 documentation; the exact installed content still depends on registration, activation, and updates.
The additional instruments documented here are Mini D, Jura, Sub Factory, Analog Dreams, Cloud Supply, Homage, Nacht, and Sway. Fabric Select is treated separately as an MPC Pro Pack instrument. You do not need to reorganize your library to use any of these instruments.
A common model for the eight instruments
Your instruments fall into three practical groups:
- Key 61 bundled instruments: Fabric XL, Stage Piano, Stage EP, Organ, OPX4, Odyssey, Hype, Studio Strings, Drumsynth, Mellotron, and Solina.
- Additional synthesis instruments: Mini D, Jura, and Sub Factory. You control oscillator/source → filter → envelopes/modulation → internal effects.
- Native Instruments MPC Editions: Analog Dreams, Cloud Supply, Homage, Nacht, and Sway. These use MPC-specific editions of Play Series concepts: blend A/B sources, shape filter/envelopes, use the available macros, then sequence or automate movement in MPC.
For any dual-layer patch:
- Solo A and B before editing the blend.
- Identify which layer provides transient, body, pitch identity, and noise/air.
- Purge or disable an unnecessary layer to save resources.
- Map macros to ranges that are playable, not merely dramatic.
- Resample a macro performance when it becomes the hook.
7.1 Mini D
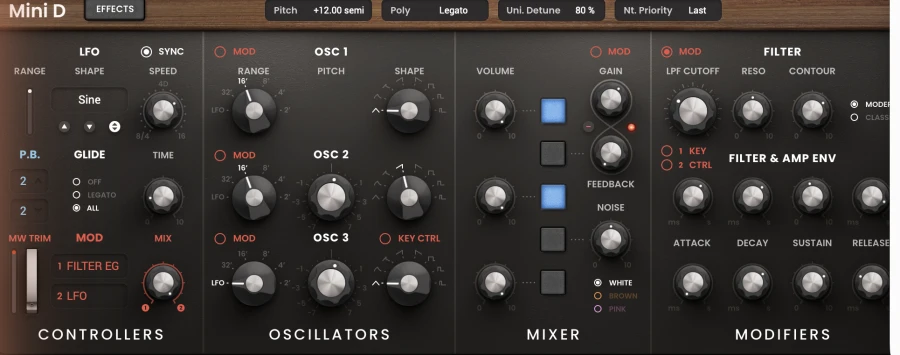
Architecture: three oscillators per voice, eight modeled oscillator shapes, classic and modern ladder-style filters, up to four voices, modulation, EQ, chorus, and tempo-syncable delay.
Best roles: mono bass, sub-supported bass, compact lead, whistle, synth brass accent, four-voice pad.
Hip-hop moves:
- For Dre/Storch low end, start with one oscillator. Add the second only for audibility/harmonics, not automatic size.
- Match amp release to note spacing. Overlong bass notes erase drum punctuation.
- Use filter envelope for the spoken consonant of a bass note; keep sustain/body separate.
- Create a second patch with more upper harmonic content for small speakers rather than solving translation with master EQ.
- On leads, map mod wheel or aftertouch to a narrow vibrato or filter range.
Goal: from init, create and save a clean bass, a talking lead, and a four-voice pad. They should remain identifiable with internal FX bypassed.
7.2 Jura
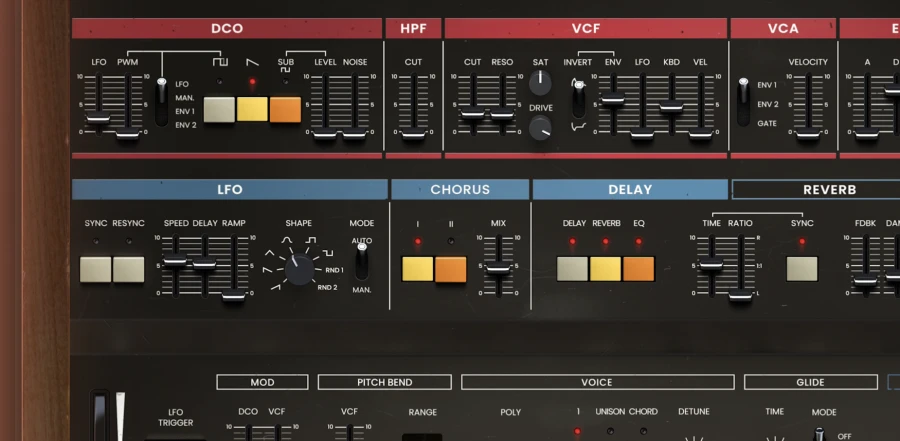
Architecture: a classic single-DCO/sub-oscillator design, modern/vintage noise, VCF with drive and saturation, two envelopes, expanded LFO shapes, two chorus types, plus delay, reverb, and EQ.
Best roles: warm bass, chorus pad, synth strings, pluck, organ-like comp, nasal lead.
Hip-hop moves:
- For Sa-Ra color, begin with pulse width or sub/DCO balance, then let slow LFO movement change one parameter.
- For Q-Tip warmth, keep chorus modest and make the filter/voicing carry the part.
- For a Storch motif, use short envelopes and a small pitch or filter performance mapping.
- Compare internal chorus with the separate AIR Jura Chorus. Use the insert when several non-Jura sources must share that color.
Goal: program a bass, a comp patch, and a wide pad. The bass should pass mono; the pad should still support the song with chorus bypassed.
7.3 Sub Factory
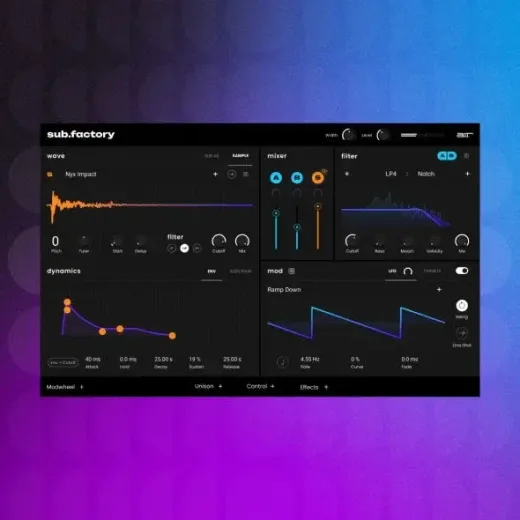
Architecture: two wavetable engines with index scanning plus a sample engine, envelopes, filters, modulation, unison/spread/width, and ring mod, chorus, drive, and EQ.
Best roles: 808, clean sine-derived sub, distorted bass, pluck, kick, bass-plus-attack hybrid.
Hip-hop moves:
- Tune first, then set note length and glide, then add harmonics. Do not EQ an out-of-tune 808 into submission.
- Use the sample layer for attack/click and wavetables for sustained identity.
- Keep sub information centered; create width from an upper layer or parallel print.
- When kick and 808 collide, decide by arrangement, note length, and phase before sidechain or severe EQ.
- Use drive to create small-speaker audibility, then level-match.
Goal: save a clean sub, a sustained 808 with controlled glide, and a short bass pluck. Test them on headphones, monitors, a phone speaker, and in mono.
7.4 Analog Dreams
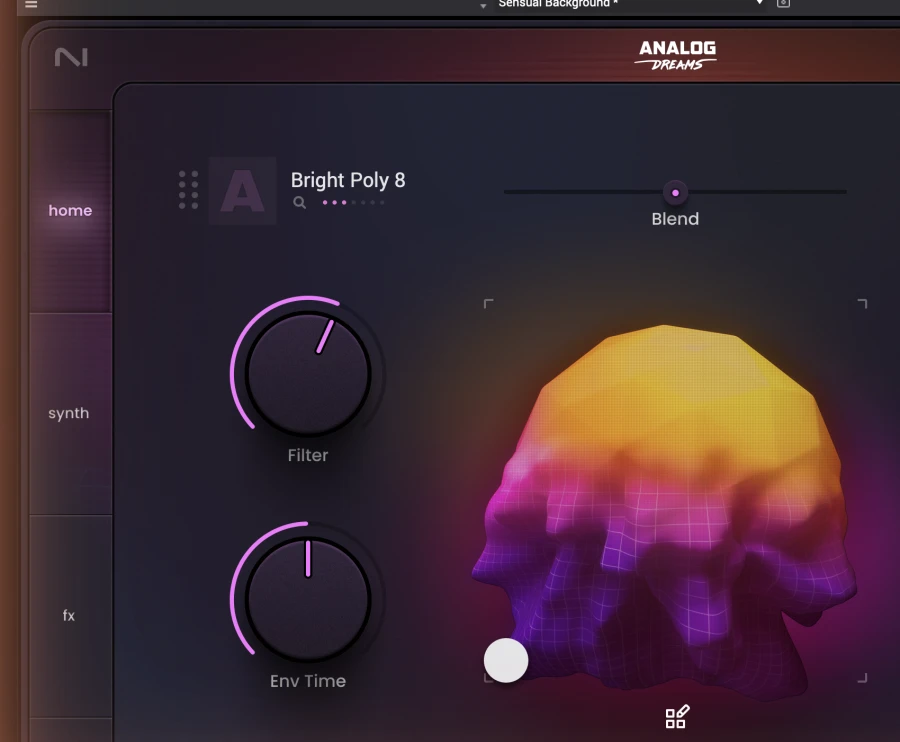
Character: vintage synth sources from the 1970s/1980s blended and processed into basses, pads, leads, plucks, and effects.
Use it for: retro-futurist chords, colorful leads, mellow pad beds, synth-funk accents.
Go beyond presets: solo the two sources, retune or octave-separate them, shorten the amp envelope, reduce built-in space, then assign one macro for harmonic density and one for motion. Many presets are intentionally cinematic; hip-hop often benefits from making them drier and narrower.
Goal: turn one large pad into three related presets: dry verse, moving hook, and printed transition.
7.5 Cloud Supply
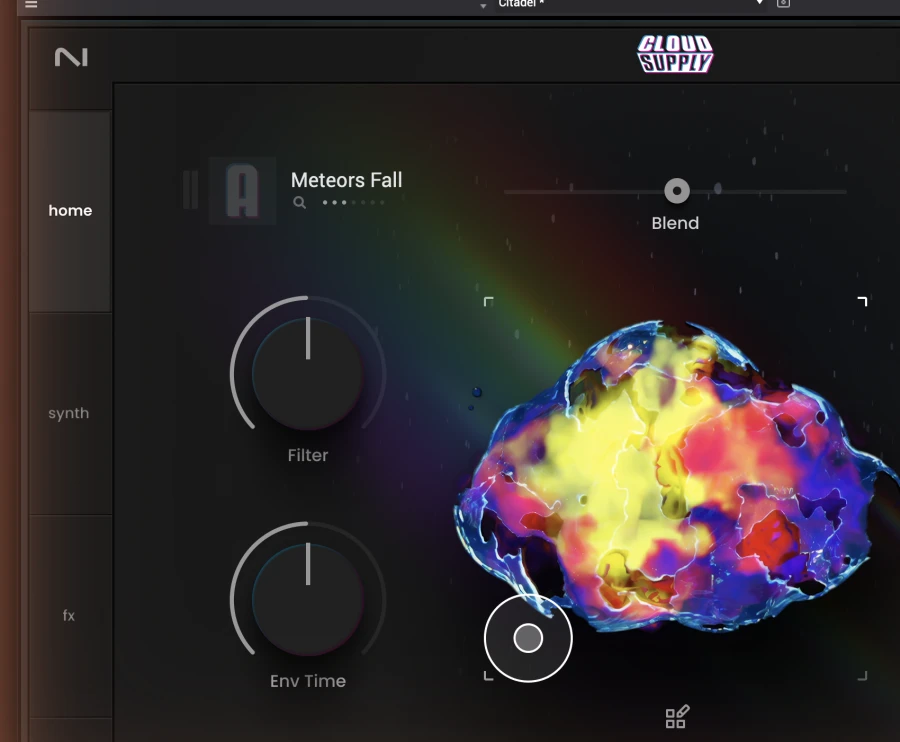
Character: modern atmospheric plucks, pads, keys, vocal-like and textural layers suited to spacious melodic production.
Use it for: high-register countertexture, airy R&B beds, vocal haze, intro/outro atmosphere.
Control strategy: high-pass only after checking whether the A/B balance can remove low-mid fog. Reduce release and reverb for rhythmic parts. Map brightness and layer balance rather than simply increasing width.
Goal: create a four-bar texture that leaves space for lead vocal, bass, and snare; automate it into and out of the chorus.
7.6 Homage
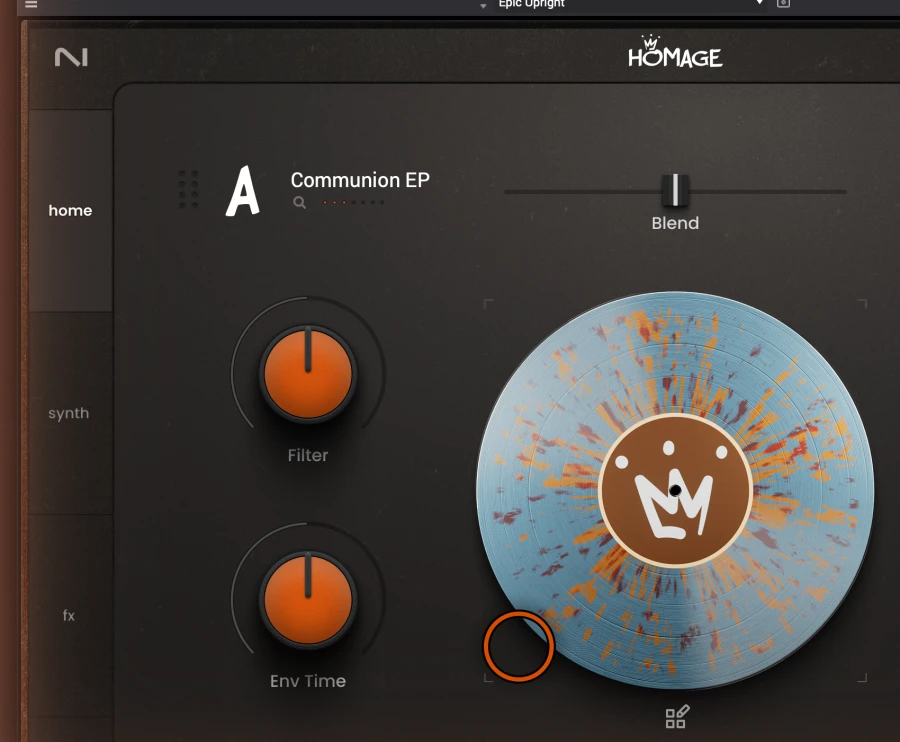
Character: a two-layer Play Series instrument centered on hip-hop lineage and lo-fi sound shaping, with macro control, filters, modulation, and custom FX chains. The MPC Edition interface is distinct from the desktop Play Series version.
Use it for: dusty keys, sample-like phrases, melodic fragments, soulful texture, second-generation resampling.
Control strategy: use the MPC track to sequence a phrase, then record or resample it and chop it like found audio. Randomize can inspire, but save the source patch first and keep only results that occupy a defined role.
Goal: make one phrase with Homage, print it, chop it to pads, and build a new eight-bar statement that no longer depends on the original preset.
7.7 Nacht
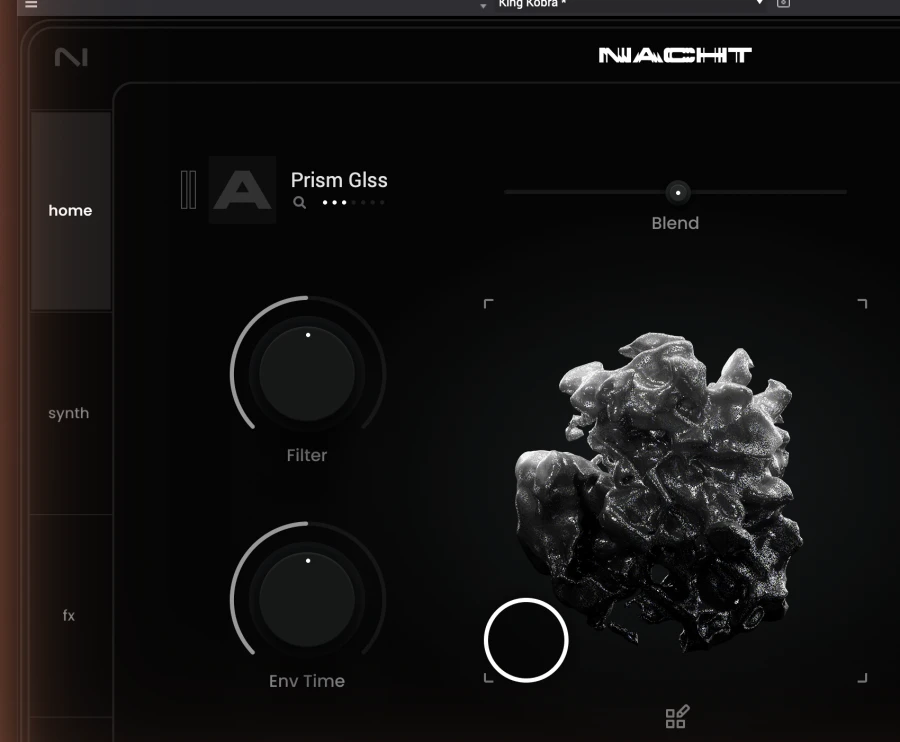
Character: dark, distorted, techno-oriented basses, leads, pads, rhythms, and special effects. Preset counts and interface details can differ between the desktop Play Series instrument and the MPC Edition.
Use it for: Muggs-like darkness, industrial percussion layers, ominous transitions, noisy bass harmonics, unsettling pads.
Control strategy: remove four-on-the-floor assumptions from the MPC sequence. Shorten patterns, change note emphasis, print textures, and re-chop. Use its aggression as contrast against dry boom-bap drums rather than turning the entire beat into techno.
Goal: derive one kick/impact, one background texture, and one playable lead from the same patch family.
7.8 Sway
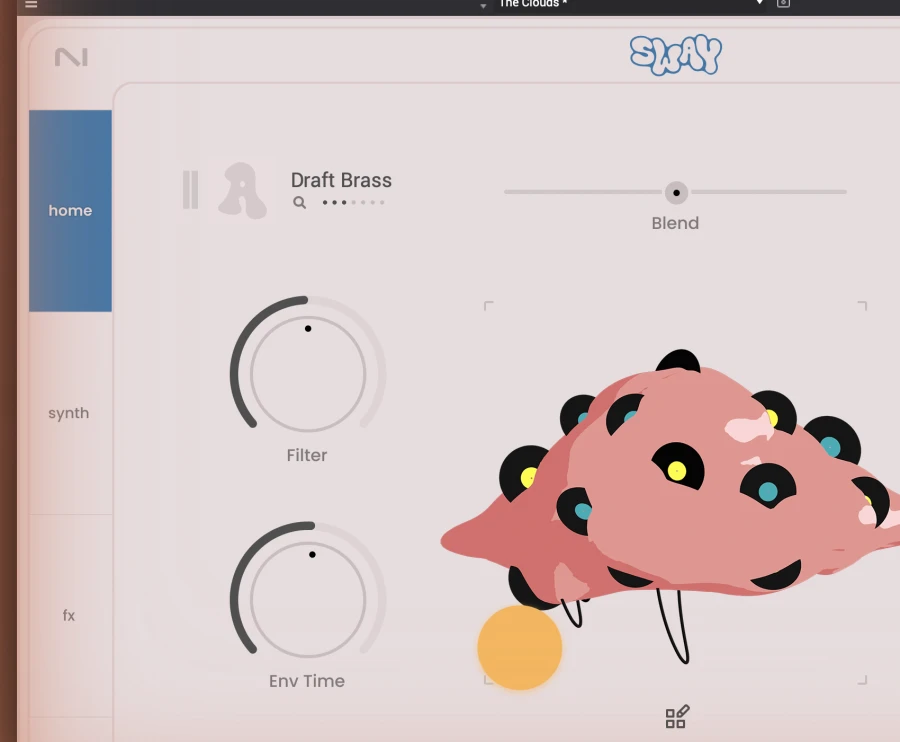
Character: soulful hip-hop/R&B sounds, samples, and effects built for chords, keys, basses, and melodic texture.
Use it for: neo-soul voicings, late-1990s/2000s R&B color, softened keys, vocal-like pads, warm melodic centers.
Control strategy: play voicings first; select patches second. Reduce preset ambience when the harmony must speak. Use layer balance to make the patch answer a sampled phrase rather than compete with it.
Goal: write one eight-bar chord progression with two inversions, then create verse/hook variants from the same patch using only layer balance, envelope, and macro changes.
Instrument rotation practice
Over eight sessions, write the same 16-bar brief with a different instrument as the main voice. Each session must include one from-init or deeply edited patch, one Q-Link performance, and one printed reusable sample. At the end, keep only presets you could identify by musical job.
8. Effects and utilities in this manual
8.0 Fast chooser
| Need | First choice | Alternative when |
|---|---|---|
| Set gain, mono, polarity, width baseline | AIR Utility | Use track controls only if no reusable diagnostic setup is needed |
| Identify/remove a frequency problem | AIR Visual EQ4 | Multiband Filterbank when the filter itself must move rhythmically |
| Add broad musical tone | AIR Stereophonic EQP | Tape Saturator when harmonics/compression matter more than EQ |
| Age or degrade a sample deeply | AIR Flavor Pro | Lo-Fly Dirt when speed and a strong archetype matter most |
| Add tape density/glue | AIR Tape Saturator | Soft Clipper when the main job is peak shape/apparent loudness |
| Catch drum peaks | AIR Soft Clipper | Tape Saturator for softer, more cumulative density |
| Add classic simple chorus | AIR Jura Chorus | Sprite for layered or customized modulation |
| Create a believable double | AIR Tape Double Track | Jura Chorus when you want obvious modulation rather than ADT |
| Add rhythmic echo | AIR Tape Echo | Sprite for a complete multi-effect patch |
| Create shared mix space | AIR Reverb Pro | Ether for a focal, unreal transformation |
| Build a complex signature texture | AIR Sprite | Ether when reverb/granular spectral space is the center |
| Perform rhythmic edits | Flex Beat | Manual chops when the exact new phrase should be permanently playable |
| Animate separate frequency bands | AIR Multiband Filterbank | Visual EQ4 for static correction |
| Add final width/depth/polish | AIR Stereophonic Enhancer | Utility when you need diagnosis/control rather than enhancement |
The following “starting moves” are directions, not magic presets. Exact values depend on source level, tempo, key, arrangement, and the version of the plugin.
8.1 AIR Utility
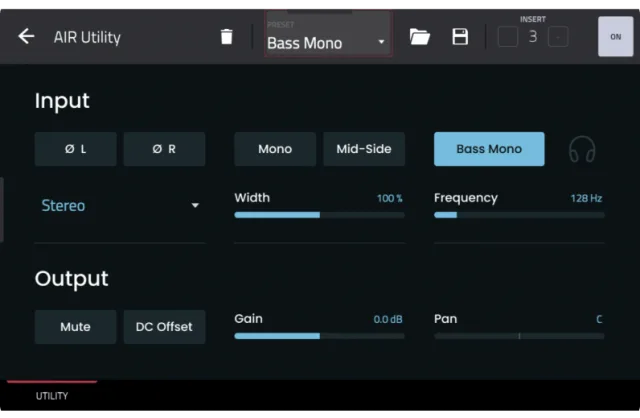
What it is: the infrastructure plugin. Use it to control or inspect gain, channel/polarity behavior, mono compatibility, balance, and width before reaching for a colorful solution.
Where it belongs:
- First insert: establish input level, correct polarity, or narrow a source before other processors react.
- Last insert: trim output, compare width, or perform a mono check.
- Return: control the level and stereo field of reverb/delay independently from the effect.
- Master: diagnostic mono/width check; bypass before final export unless it has an intentional job.
Maximum-value moves:
- Create a
MONO CHECKpreset and a neutralGAIN TRIMpreset. - On doubled live guitar, invert polarity only as a test; keep the setting that produces the most solid intended relationship, not simply the loudest stereo result.
- Narrow old stereo samples before widening newer supporting parts. This often creates more depth than enhancing everything.
- Put Utility before a saturator and compare equal input drive; then put it after to level-match output. This teaches whether you are hearing tone or loudness.
Trap: using width to solve an arrangement in which two parts occupy the same register and rhythm.
Mastery drill: diagnose five files: mono source, true stereo source, artificial stereo source, polarity-compromised double, and bass-heavy loop. Write what Utility reveals and the smallest correction.
8.2 AIR Visual EQ4
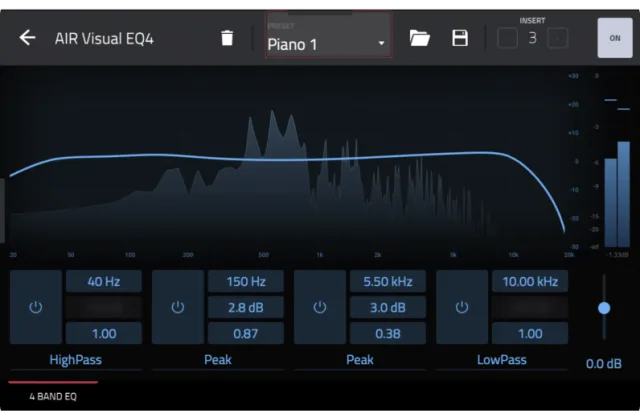
What it is: a four-band EQ with a visual spectrum interface, designed for corrective and tonal shaping. It belongs in the Pro Pack toolset.
Mental model: frequency, gain, and bandwidth/Q answer three different questions: where, how much, and how wide. The analyzer shows energy, not importance.
Maximum-value moves:
- Search with a temporary narrow boost, find the offensive resonance, then turn the move into a small cut and confirm in context.
- Use a high-pass filter for nonmusical rumble only after deciding whether body or room tone is part of the sound.
- On a sampled loop, automate or duplicate EQ states for verse/hook contrast instead of stacking new instruments.
- On live bass, inspect note-to-note buildup; correct the recording/playing or envelope before making a narrow static cut that harms every note.
- On reverb returns, remove lows and excess presence so the space supports rather than masks the dry source.
Trap: tracing the inverse of the analyzer until every source looks flat. Hip-hop is not spectrally flat, and neither is a meaningful instrument.
Mastery drill: solve one resonance, one masking collision, one excess-rumble problem, and one intentional telephone/filtered effect. Level-match all four.
8.3 AIR Stereophonic EQP
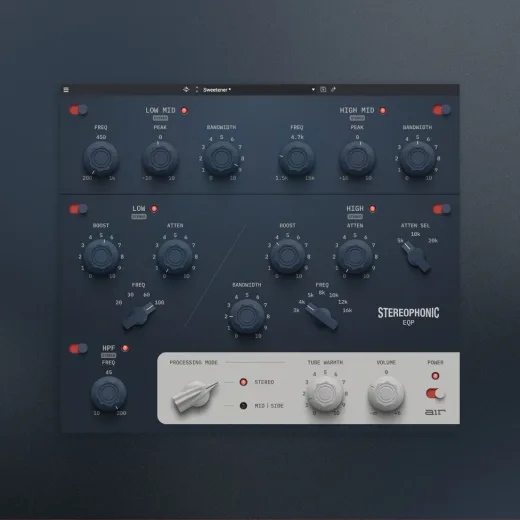
What it is: broad, musical EQ inspired by classic EQP-1A/MEQ-5 behaviors, with low, low-mid, high-mid, high, adjustable high-pass filtering, Tube Warmth, width, and stereo or Mid/Side operation.
Choose it when: you can describe the desired tone in broad words—weight, openness, body, sweetness, forwardness—not when hunting a narrow whistle.
Maximum-value moves:
- Give a drum bus broad weight or presence after individual sounds already work.
- Add low-end authority to bass carefully while monitoring kick ownership.
- In Mid/Side mode, keep central fundamentals stable while gently shaping side brightness or low-mid congestion.
- Use Tube Warmth as part of the gain-staging test: increase character, compensate output, then judge the broad EQ.
- For guitar/horns/vocals, use wide mid moves that respect the performance rather than surgically hollowing it out.
Trap: the Pultec-style idea of simultaneous boost/attenuation is musical because curves interact, but it is not automatically better. Watch headroom after low and high boosts.
Mastery drill: create three presets: BUS WEIGHT, VOCAL/HORN POLISH, MID-SIDE OPEN. Each must use fewer moves than your Visual EQ4 equivalent and win at matched loudness.
8.4 AIR Soft Clipper
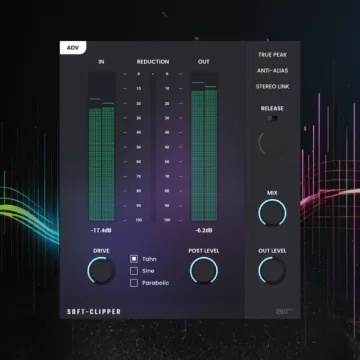
What it is: controlled nonlinear peak shaping. Quick view exposes Drive, Post Level, and metering; advanced controls include Shape, True Peak/anti-alias options, Stereo Link, Release, Mix, and output calibration.
Why it matters for hip-hop: a few tall kick/snare peaks can consume headroom without sounding subjectively loud. Gentle clipping can round those peaks and increase density before a final limiter or export stage.
Maximum-value moves:
- On individual kick/snare, drive until attack audibly shortens, then back off.
- On drum submix, compare linked stereo behavior so one side does not distort differently on asymmetric percussion.
- Use Mix for parallel density, but confirm that the dry/processed combination does not create unexpected peaks.
- Use anti-alias/true-peak options when quality matters and CPU allows; print the result if the live project becomes unstable.
- Place before a tone EQ when you want a predictable clipped signal; place after broad boosting when it must catch the new peaks.
Community/engineer pattern: users and engineers commonly favor clipping on individual drums or subgroups, shaving only the loudest peaks rather than crushing the full mix. AIR’s own product testimonials specifically call out kicks, snares, keygroups, and subgroups.
Traps: mistaking reduced transient contrast for “punch,” clipping cymbals into metallic hash, and comparing a louder output against a quieter bypass.
Mastery drill: print clean, 1 dB-ish peak shave, obvious clip, and parallel versions of the same drum bus. Blind-pick at low volume and on headphones.
8.5 AIR Tape Saturator
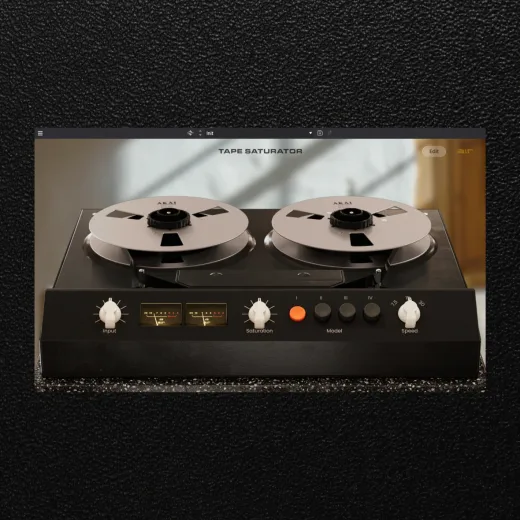
What it is: four tape-inspired saturation models with harmonics, soft compression/transient smoothing, condition/age controls, wow, flutter, dropout, noise, tape-speed tone, auto gain, clipping choice, and additional shaping.
Choose it for: cohesion and density whose motion belongs to a medium, not for rhythmic repeats.
Maximum-value moves:
- Drums: add density until hats soften slightly, then decide whether that helps the era and groove.
- Bass: generate upper harmonics for translation; keep low fundamentals controlled.
- Vocals/horns: add weight without obscuring consonants or attacks.
- Sample bus: choose tape speed by tonal result—darker/full versus brighter/focused—before reaching for more EQ.
- Mix bus: use the cleanest condition, low instability, and tiny drive; do not make the master your first experiment.
- Abuse: high age/dropout/wow on a duplicate, then resample isolated phrases for transitions.
Trap: enabling every imperfection because the plugin offers it. Saturation, wow/flutter, noise, and dropouts are separate artistic decisions.
Mastery drill: save CLEAN GLUE, DRUM DENSITY, BASS TRANSLATION, and BROKEN PRINT; document model, tape speed, drive, and why each exists.
8.6 Lo-Fly Dirt
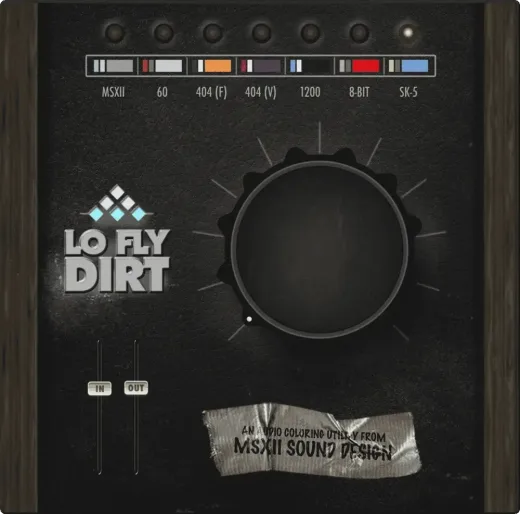
What it is: a fast seven-mode character processor from MSXII/AIR. Available modes include MSXII default saturation/compression, 60-style 12-bit color, 404 low-pass, 404 vinyl, 1200-style low-mid/12-bit weight, 8-bit console, and SK-5-style 8-bit/high-pass character.
Choose it when: you want a recognizable old-device family quickly. Choose Flavor Pro when you need to design each component independently.
Mode map:
| Mode | Starting use |
|---|---|
| MSXII | Gentle drum/sample cohesion |
| 60 | Rounded high end and classic sampler suggestion |
| 404 (F) | Band-limited sample or transition |
| 404 (V) | Vinyl noise/texture blend |
| 1200 | Harder drum and low-mid attitude |
| 8-bit | Obvious game-console artifact and punch |
| SK-5 | Thin, aggressive, high-passed special effect |
Maximum-value moves:
- Put it on a duplicate drum bus and blend with clean transients.
- Use 60 or 1200 on individual kicks/snares to avoid degrading every hat.
- Print 404 (V) texture, then gate/chop it so noise participates in rhythm rather than running continuously.
- Resample a clean plugin phrase through a mode, then chop it: “found” is often more convincing than inserting lo-fi on every live track.
Community note: product users repeatedly highlight drums, bass, old-machine texture, the usefulness of presets, and conservative dry/wet control; producer Kev Brown specifically called out the Cold Piece preset as a useful starting point. Treat named presets as starting hypotheses, not universal settings.
Trap: coating kick, snare, sample, bass, master, and vocals with the same device signature until depth disappears.
Mastery drill: process the same break through all seven modes, loudness-match, label the changed bandwidth/transient/noise behavior, and keep only three personal presets.
8.7 AIR Flavor Pro
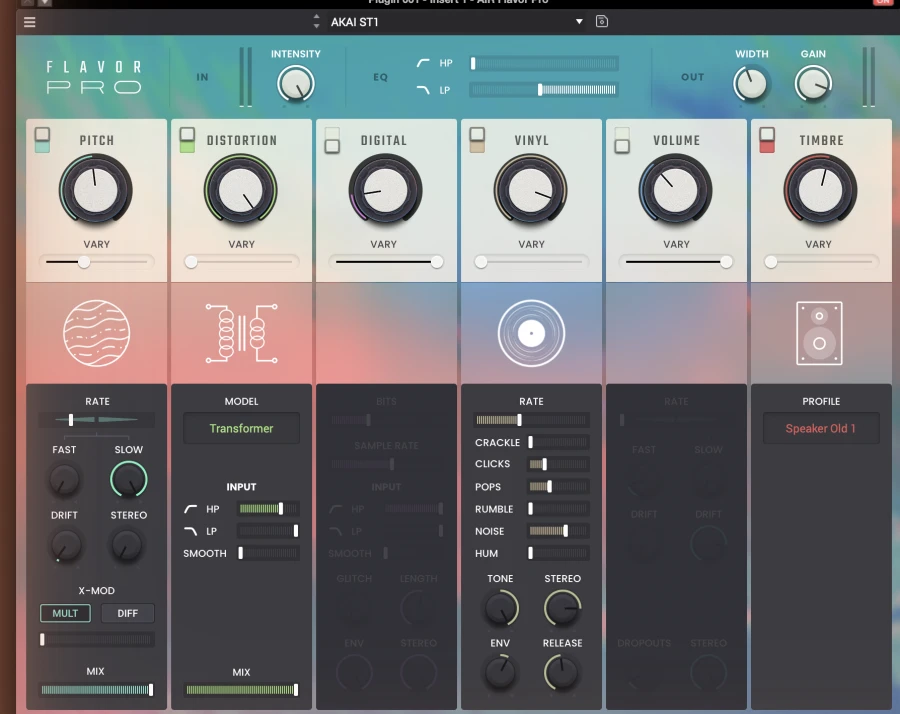
What it is: a modular lo-fi multi-effect with six primary ingredient areas: wobble/flutter, saturation/distortion, sample-rate/bit-rate reduction, vinyl noise, tape drift/dropouts, and 32 timbre/EQ profiles, plus global intensity, filters, width, gain, and Q-Link mapping.
The right way to learn it: bypass all modules, then add one at a time. A preset often combines pitch instability, bandwidth loss, distortion, noise, and level change; without decomposition you cannot repeat the useful part.
Module strategies:
- Wobble/flutter: slow, shallow movement for aged keys; fast flutter as a transition or unstable flute/vocal effect.
- Saturation/distortion: test Tube, Speaker, Vinyl, Synth and other models by harmonic shape, not name.
- Sample/bit reduction: filter before/after mentally; reduced rates can create bright aliases, while low-pass smoothing hides them.
- Vinyl: separate hum/rumble from clicks/pops. Gate or automate them around phrases.
- Drift/dropouts: print performances. Random-feeling events are hard to reproduce later and excellent as unique source.
- Timbre profiles: audition as arrangement EQ—radio, gramophone, boombox—before adding separate filters.
Style moves: parallel sample aging for Q-Tip/Easy Mo Bee warmth; aggressive one-bar dropout before a Premier-style return; degraded synthetic keys for Sa-Ra; band-limited intros for Muggs atmosphere.
Trap: using Width after degradation without mono checking, or turning global Intensity up instead of deciding which module deserves more.
Mastery drill: from one clean loop make SUBTLE AGE, SAMPLER MEMORY, CASSETTE FAILURE, RADIO INTRO, and NOISE-FREE COLOR. Save both preset and printed audio.
8.8 AIR Jura Chorus
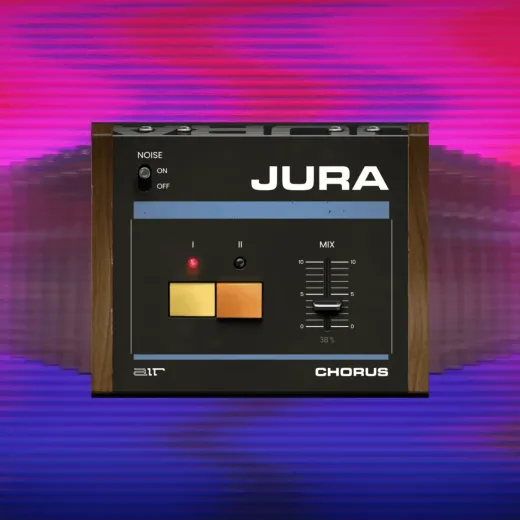
What it is: the classic chorus character associated with Jura’s synth lineage, offered as Chorus I, Chorus II, or both, with Mix and optional modeled noise.
Choose it when: the musical decision is simply “classic warm stereo chorus.” Choose Sprite when you need rate, feedback, several modulation types, additional EQ/delay/reverb, or envelope control.
Maximum-value moves:
- Chorus I for subtle thickening of keys, bass upper harmonics, or background vocals.
- Chorus II for more obvious width on pads, guitar, or flute.
- I + II for an effect statement; high-pass or narrow the source if the center becomes weak.
- Add modeled noise only when the noise belongs to the arrangement or printed source.
- Use on a shared synth/guitar bus to make unlike sources feel recorded through one period-specific device.
Trap: wide chorus on the sub, or using both modes by default because “more” sounds impressive in solo.
Mastery drill: compare I, II, and both on mono guitar, dry keys, bass, and vocal. Save a mono-safe subtle preset and one wide effect preset.
8.9 AIR Tape Double Track
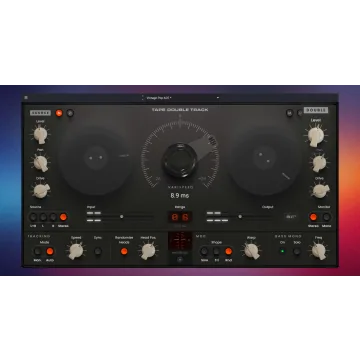
What it is: automatic double tracking via delay, varispeed, pitch movement, and modulation. It includes different modulation shapes, warp, head randomization/recalibration, independent source/double channel level, pan, drive, mute, and phase, plus Bass Mono/Solo Bass tools.
Choose it for: a believable second performance illusion, richer mono sources, or intentionally psychedelic drift.
Maximum-value moves:
- Vocals: keep the source central; put the double lower and wider, filter/drive it differently, and automate it into hooks.
- Guitar: compare a real second take against ADT. Real double gives performance variance; Tape Double Track gives controllable period character.
- Horn/flute: use a narrow delay/pitch difference to build a section illusion, then keep lead articulation clear.
- Keys/samples: mute or pan channels to create asymmetrical source material, then resample.
- Bass/808: use Bass Mono and make any width live above the fundamental. Always mono-check.
Community/artist pattern: AIR’s product page repeatedly highlights vocals, guitar, synths, bass, source/double drive, and Bass Mono. The transferable tip is to treat the two channels as a miniature mix, not one “width” knob.
Trap: modulation so deep that pitch confidence disappears, and phase settings that sound huge in stereo but hollow in mono.
Mastery drill: save VOCAL HOOK, GUITAR ADT, MONO-SAFE KEYS, and PSYCHEDELIC PRINT; compare each against a true second take where possible.
8.10 AIR Tape Echo
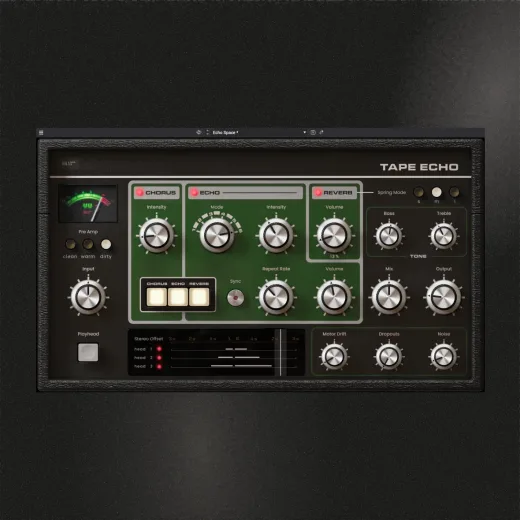
What it is: a tape-inspired, multi-head delay with selectable three-head combinations, Dirty/Clean/Warm preamp modes, chorus, motor drift, dropouts, noise, stereo offset, joggable timing, BPM sync, spring reverb, and tone shaping.
Choose it for: echoes that evolve in tone and timing. Choose Reverb Pro for stable shared depth, or Sprite when echo is one part of a larger signature chain.
Maximum-value moves:
- Use head combinations to write rhythm: dotted answers, dense rolls, or sparse quarter/eighth responses.
- Filter repeats so lyrics, snare attack, and main melody remain readable.
- Put it on a return for shared throws; automate send amount instead of keeping echo on every word.
- Ride feedback into one phrase, then pull it before runaway buildup. Print unstable passes.
- Try chorus/reverb on repeats rather than dry source for depth behind the performer.
- On bass, restrict bandwidth and timing so repeats become upper-harmonic rhythm rather than sub mud.
Artist/user pattern: product contributors mention pianos, vocals, melodies, bass, drum-kit sound design, stock-preset disguise, and sync plus hardware-like drift. The common theme is movement with controlled bandwidth.
Trap: feedback plus spring/reverb accumulating low-mid energy. Put Utility/EQ after the return if necessary.
Mastery drill: make SLAP, PREMIER THROW, DUB FEEDBACK, and MELODY HAZE. Each preset must have a defined “feedback emergency” Q-Link or bypass move.
8.11 AIR Reverb Pro
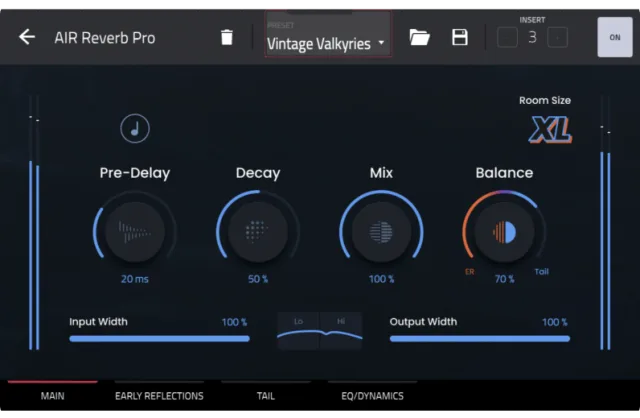
What it is: Pro Pack’s higher-quality algorithmic reverb for natural and designed spaces. Akai documents a limit of four instances on first-generation hardware and sixteen on second-generation hardware. The Key 61 belongs to the earlier standalone generation for planning purposes, so design around returns and confirm the live meter/behavior on your unit.
Choose it for: the coherent world of the record—short drum room, vocal plate-like space, longer instrument hall—rather than one-off surreal transformation.
Maximum-value moves:
- Create two returns:
ROOM SHORTandMUSIC LONG. - Set decay for tempo and density; a long reverb in a busy 92 BPM beat may need less send, more filtering, or rhythmic gating.
- Use pre-delay to preserve consonants, drum attack, pick noise, and horn articulation.
- Filter the return aggressively enough that kick/bass remain direct and the reverb does not hiss above the aesthetic.
- Automate sends at phrase endings; leave the source dry enough that groove stays forward.
- Print long special tails when they become arrangement events.
Trap: inserting separate premium reverbs on many tracks, wasting CPU and creating unrelated rooms.
Mastery drill: place dry drums, lead vocal, guitar, horns, and flute in one believable ensemble using no more than three returns. Then make one deliberately unreal transition with a printed tail.
8.12 AIR Ether
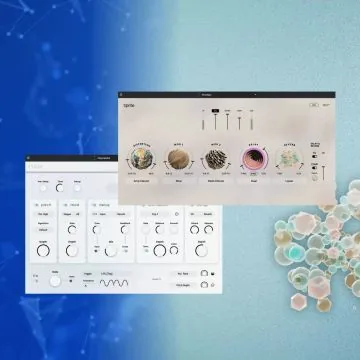
What it is: a creative reverb/multi-effect designed for unusual spatial, spectral, and textural transformation. Akai documents a maximum of two Ether instances on first-generation standalone MPCs.
Choose it for: a foreground sound-design event or signature atmosphere. Reverb Pro is the default for practical room/plate/hall duties.
Maximum-value moves:
- Put it on one focal sample, vocal fragment, guitar harmonic, flute breath, or Nacht texture.
- Build the effect at 100% wet on a return to understand what Ether contributes without confusing it with dry level.
- Filter and time the return so it occupies a different register and phrase position.
- Automate send into transitions; freeze/print long or CPU-heavy passages.
- Reverse or re-chop printed Ether tails to create playable atmospheres.
Trap: using two instances because two are allowed. One intentional transformed element is more legible than an entire arrangement submerged in special space.
Mastery drill: from one vocal syllable create a pad, riser, impact tail, and playable keygroup. No additional synth source allowed.
8.13 AIR Sprite
What it is: a deep multi-effect behind a five-control macro surface. Internally it includes nine distortion models, two modulation slots (flutter/wow/tremolo/autopan and chorus/multichorus/phaser/flanger families), eight reverb characters, single/dual/cross tempo delays with multiple feedback setups, pitch shift, input/output EQ, width/balance, envelope follower, and final gain/limiting.
Choose it for: a repeatable signature chain in one device. Choose individual processors when diagnosis, simple routing, or CPU clarity matters more.
Build it in layers:
- Bypass everything; set gain.
- Add distortion and input filtering.
- Add only one modulation slot.
- Decide whether pitch shift supports the harmony.
- Add delay, then reverb; filter their returns internally.
- Use output character EQ and width last.
- Map the five macros around musical states, not maximum travel.
High-level uses: turn a clean Rhodes-like line into Sa-Ra ear candy; give one-shot guitar/horn fragments motion; create R&B vocal ad-lib chains; animate electronic drums; envelope-follow delay/reverb so space changes with performance intensity.
Community/artist pattern: product users emphasize starting fast from presets, then opening the deep editor; several identify the envelope follower and output EQ/dynamics as the hidden power. Translate that into one rule: make the source drive the effect instead of drawing every change.
Trap: leaving limiter/output gain to hide level explosions and believing all active modules are necessary.
Mastery drill: create one patch with only two modules, one with four, and one full performance patch. Save versions after every added module so you can prove each earns its place.
8.14 Flex Beat
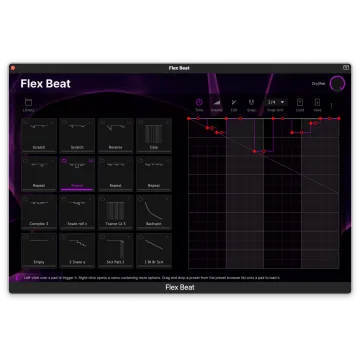
What it is: an FX player with sixteen FX slots. In full MPC, Akai documents Flex Beat as applying effects according to MIDI activity already recorded in the arrangement/grid; press Play or Play Start for the effects to run. The MPC Sample has a related built-in 16-effect mode accessed with Shift + Pad FX, where effects are selected from the pads. Do not treat those two workflows as identical.
Choose it for: fills and performance edits. Choose manual chopping when the new phrase must be deterministic and playable as a permanent program.
Maximum-value moves:
- Record or program the source MIDI first, then choose related FX slots: short repeat, long repeat, reverse, and stop.
- Use them only at bar 4/8/16 boundaries until your restraint is automatic.
- Edit the source MIDI and any available effect automation to remove accidental triggers while preserving the musical gesture.
- Apply to a music bus, drum bus, or resampled phrase—not automatically the master.
- Print a performance and chop the best accidents into a new kit.
- On MPC Sample, use the built-in 16 Flex Beat effects to encode transition intent; expand and refine later on the Key 61.
Trap: constant glitching removes the contrast that makes a fill read as a fill.
Mastery drill: create a 32-bar beat with exactly four distinct Flex Beat events and 28 bars of untouched pocket. Then perform an “abuse pass,” resample it, and salvage four one-shots.
8.15 AIR Multiband Filterbank
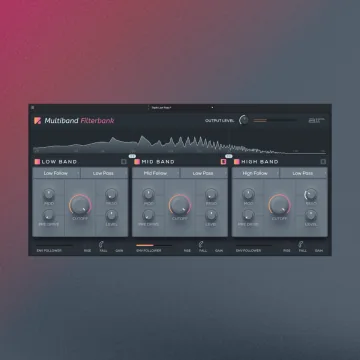
What it is: a three-band filter system with adjustable crossovers, per-band cutoff/resonance/filter type, pre-filter drive, level, per-band envelope-following behavior, modulation, live spectrum, and solo. Filter types include low-pass, band-pass, high-pass, notch, and peak.
Choose it for: frequency-selective movement and sound design, not simple static correction.
Maximum-value moves:
- Solo each band and set crossovers by musical role: kick/sub, sample body/snare, hats/air.
- Drive only the band that needs harmonics or grit.
- Use envelope followers so drum attacks open one band while sustained material behaves differently.
- Make complementary motion: low band stable, middle rhythmic, high band sparse.
- Remove or exaggerate elements inside a full sample, then print and re-chop.
- Use a Q-Link for one macro-like band sweep with safe minima/maxima.
Community/artist pattern: users on AIR’s product page repeatedly cite drum-bus texture, the mid-band sweep, envelope followers, Triple Peak-style crispness, and simultaneous automation. The durable lesson is to build the bands one at a time, then animate only one or two.
Trap: three resonant filters, three drives, and three modulators all moving at once can destroy phase clarity and rhythmic focus.
Mastery drill: make a dead loop breathe without changing MIDI: one envelope-driven version, one manual Q-Link version, and one destructive isolated-band print.
8.16 AIR Stereophonic Enhancer
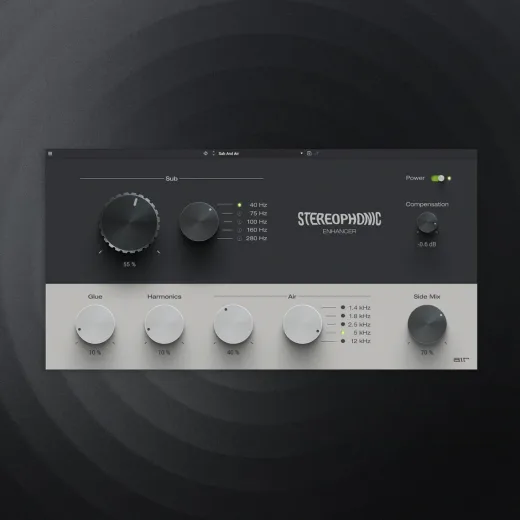
What it is: a mastering-oriented stereo processor intended to add depth, width, cohesion, low-end weight, harmonic richness, and top presence with a low-phase-shift design.
Choose it for: subtle bus or mix polish after balance and mono compatibility work. Choose Utility for diagnosis, EQP for broad tone, and Tape Double Track for obvious doubling.
Maximum-value moves:
- Try on the music bus while leaving drums/bass centered.
- Compare very small adjustments at matched loudness; enhancement is easy to overvalue in solo.
- Use on a stereo live-instrument group only if the source already has a stable center.
- Check mono, headphones, and one small speaker after every move.
- Automate less enhancement in dense verses and slightly more openness in hooks only if the transition is inaudible as an “effect.”
Trap: adding low-end enhancement to a mix whose kick/bass arrangement is unresolved, or widening an unstable sample until mono collapse.
Mastery drill: produce three matched exports: bypass, subtle, and obvious. Blind-test the subtle version; reject it if center, snare, or bass weakens.
8.17 Effect-chain recipes
These are routing recipes, not settings.
Dusty sample without blanket mud
Utility gain → Flavor Pro (pitch/sample color, noise minimal) → Visual EQ4 cleanup → parallel clean blend
Print it, then chop the print. Keep the original sample program.
Knock without crushed hats
Individual kick/snare Soft Clipper → drum submix Tape Saturator → optional EQP broad tone
Let hats bypass the most aggressive nonlinear stage if they turn metallic.
Wide R&B keys with a stable center
Source envelope/voicing → Jura Chorus I or Tape Double Track → Utility mono check → Reverb Pro send
Keep a mono anchor layer or narrow low frequencies.
Dark Muggs-like atmosphere
Nacht or sample texture → Visual EQ4 bandwidth choice → Ether send → printed tail → reverse/chop
Keep drums comparatively dry.
Live horn/flute throw
Corrective EQ if needed → Tape Saturator light → Tape Echo send automation → Reverb Pro shared room
Print feedback only at the phrase ending.
Sa-Ra-style synthetic mutation
Jura/Analog Dreams phrase → Sprite movement → Tape Saturator → resample → chop to drum program
The second-generation sample should become playable instead of remaining an eight-bar plugin loop.
9. Live instruments and vocals
9.1 Capture protocol
For guitar, bass, drums, horns, flute, sound effects, or vocals:
- Create named audio tracks before connecting players.
- Confirm input type, gain, monitoring, latency, and headphone path.
- Record 20–30 seconds and listen for noise, clipping, room problems, and performer comfort.
- Leave headroom. A clean 24-bit capture can be made louder later; clipped transients cannot generally be restored reliably.
- Record complete musical passes before punching details.
- Preserve originals and comp/edit copies.
- Record MIDI plus audio for external electronic instruments when possible.
- Note instrument, player, mic/DI, input, tuning, tempo, and take.
9.2 Guitar
- Decide DI, miked amp, or both. If both, check timing/polarity.
- Double by performance for important width; use Tape Double Track when the aesthetic is ADT or a second take is unavailable.
- Use Jura Chorus for classic color, Sprite for a designed pedalboard, and Tape Echo for throws.
- Keep pick attack if it supplies groove. Do not low-pass all life out of a sample-era guitar.
9.3 Bass
- Record DI clean even when monitoring a colored chain.
- Align note length with kick spaces before EQ or compression.
- Blend live bass character with a restrained Sub Factory fundamental only when the roles are distinct.
- Tape Saturator can add translation; EQP can add broad weight; Soft Clipper is for exceptional peak control, not automatic flattening.
9.4 Live drums and percussion
- Preserve phase relationships; never flip polarity by habit.
- Edit the ensemble, not isolated transients. Moving every close mic independently can damage the kit.
- Use sampled reinforcement only where it supports the performance.
- Short Reverb Pro room can connect dry samples and live percussion.
- Parallel Lo-Fly Dirt, Tape Saturator, or Soft Clipper can add attitude while preserving a clean path.
9.5 Horns and flute
- Capture complete phrases with breath and articulation.
- Build sections through actual overdubs first; ADT is a color, not a substitute for all ensemble playing.
- Pre-delay on Reverb Pro preserves attacks; Tape Echo throws work at phrase endings.
- A lightly saturated, band-limited duplicate can create old-record character without degrading the lead.
- Turn breaths, key clicks, and falls into a percussion/FX program.
9.6 Vocals
- Record the driest safe, comfortable signal and monitor effects without necessarily printing them.
- Organize lead, doubles, ad-libs, hooks, and textures as roles.
- Tape Double Track helps hooks/ad-libs; Reverb Pro creates shared depth; Tape Echo handles selective throws; Sprite/Ether produce one-off design moments.
- Use Stem Separation on references for study or on your own bounced material for rearrangement—not as a replacement for saving isolated original takes.
9.7 Found sound
Use MPC Sample’s internal mic or Key 61 inputs to collect doors, keys, room tones, breath, traffic, kitchen hits, strings, and mechanical noise. Make one clean program and one processed program. A personal found-sound kit is more distinctive than another thousand anonymous one-shots.
10. Routing, templates, and finishing
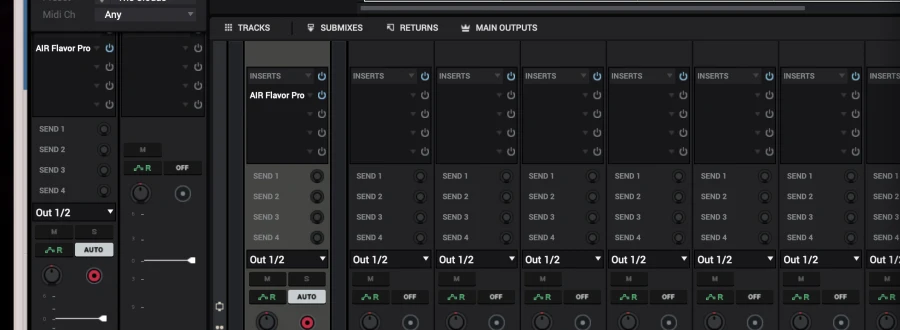
10.1 A practical default project template
Create this once, then refine it:
| Group | Tracks | Default routing |
|---|---|---|
| Drums | Kick, Snare, Hats, Perc, Break/Chops | DRUM BUS |
| Sample | Main, Alternate/Filtered, Texture | MUSIC BUS |
| Instruments | Bass, Keys Main, Counter, Live Guitar/Horns/Flute | MUSIC BUS or LIVE BUS |
| Vocals | Lead, Hook/Double, Ad-libs | VOCAL BUS |
| FX prints | Flex, Ether/Sprite, Reverse/Tail | FX BUS |
| Returns | Room Short, Music Long, Tape Echo | Main |
| Buses | DRUM, MUSIC, LIVE, VOCAL, FX | Main |
Template principles:
- Returns begin bypassed or at zero send.
- No master “make it loud” chain while writing.
- Q-Link bank 1 = tone, 2 = space, 3 = rhythm, 4 = destruction.
- Track colors and names are fixed enough to build muscle memory.
- Include one muted reference track routed around creative master processing.
- Save an empty template and a “starter” template with your favorite neutral drum map.
10.2 Performance template
Use Key Ranges and multi-arm so keys and pads address separate tracks simultaneously. A useful split:
- Pads: drum program or clips.
- Lower keys: Mini D/Sub Factory bass.
- Middle keys: Sway/Jura/Analog Dreams chords.
- Upper keys: lead, horn, or one-shot phrase.
- Pedal/aftertouch: sustain, filter expression, or effect send with a narrow safe range.
10.3 CPU discipline
- Reverb Pro and Tape Echo usually belong on returns.
- Remember first-generation guidance: up to two Ether and Sprite instances each; Reverb Pro planning limit four. Confirm behavior on the Key 61 rather than testing failure during a performance.
- Print complex Sprite/Ether/Tape feedback performances.
- Disable or remove unused instrument layers.
- After committing a plugin track, bounce it and mute/disable the source; preserve the editable version.
- Use Super Warp only on material that needs it.
- Save before experimenting with high-feedback or high-CPU chains.
- MPC 3.9 can occasionally produce a blank WAV during Audio Mixdown. Open and audition every exported file before sending it to someone or moving on.
10.4 Mix sequence
- Static balance: no automation, minimal effects.
- Source cleanup: trim, envelopes, tuning, note lengths, unwanted noise.
- Routing: groups and returns.
- Corrective work: only identifiable problems.
- Character: intentional color at track or bus level.
- Depth/stereo: short/long returns, width contrast, mono check.
- Automation: arrangement-driven rides and throws.
- Peak control: individual/subgroup clipping only where necessary.
- Reference: matched loudness, multiple playback systems.
- Export and reopen: mix, instrumental, useful stems, and self-contained project.
10.5 Export checklist
- Start and ending are intentional; effect tails are intact.
- No accidental solo, mute, arm, input monitor, or clip latch remains.
- CPU-heavy passages rendered without glitches.
- Mix and instrumental exported.
- Clean and processed stems exported where collaboration/revision may need both.
- Track, submix, and return exports begin at the same timeline point.
- Sample rate, bit depth, and normalization match destination.
- Filename includes title, stage/date, and version.
- Source/license and musician notes are current.
- Project is collected/self-contained, restarted, and reopened successfully.
11. A 16-week mastery curriculum
Use three sessions per week:
- Technique (30 min): one capability in isolation.
- Application (45 min): put it into a beat.
- Finish (60–90 min): export a short artifact and write a five-line retrospective.
| Week | Focus | Required artifact |
|---|---|---|
| 1 | MPC storage locations, project reopen, backup | One self-contained restored project and one reusable kit |
| 2 | MPC Sample capture, Knob FX, Pad FX, Flex Beat | One sketch opened and preserved on Key 61 |
| 3 | Drum programs, layers, envelopes, mute groups | One standardized 16-pad core kit |
| 4 | Chopping, stem separation, resampling | One source transformed into four distinct programs/prints |
| 5 | Timing Correct, swing, humanize, manual offsets | Tight, swung, and elastic versions of one beat |
| 6 | Sequences, Next Sequence, Song, Arranger | A two-minute arrangement with four sections |
| 7 | Clip Launch, follow actions, Q-Link performance | Two different performances from one scene set |
| 8 | Mini D, Jura, Sub Factory | Nine personal patches and one bass-led piece |
| 9 | Analog Dreams, Cloud Supply, Homage, Nacht, Sway | Five 60-second character studies |
| 10 | Utility, Visual EQ4, EQP | One corrective mix, one broad-tone mix, notes for every move |
| 11 | Soft Clipper, Tape Saturator, Lo-Fly Dirt, Flavor Pro | Four level-matched drum/sample print families |
| 12 | Jura Chorus, Tape Double Track, Enhancer | Mono-safe width shootout on keys, guitar, vocal, and bass |
| 13 | Tape Echo, Reverb Pro, Ether | A three-depth mix plus one printed spatial event |
| 14 | Sprite, Multiband Filterbank, Flex Beat | A 32-bar effects performance with restrained fills |
| 15 | Live instrument/vocal capture, comping, Auto Sampler | One playable keygroup and one ensemble piece |
| 16 | Full production, stems, archive | A finished track, instrumental, stems, presets, project notes, and restored archive |
Weekly retrospective
- What operation still made me search a menu?
- What decision improved the music rather than showcasing a feature?
- What became a reusable program, preset, template, or sample?
- What failed in mono or at matched loudness?
- Could the project reopen with only the SSD and licensed plugins?
- What will I deliberately exclude next week?
12. Skill checklist
Hardware and OS
- Create, route, name, color, arm, mute, solo, and delete all six track types.
- Play separate pad and keyboard tracks simultaneously.
- Record audio from line/mic and sequence external MIDI.
- Navigate Main, Grid, Track Edit, Sample Edit, Channel Mixer, Song/Arranger, and Clip Launch without a tutorial.
- Build with sequences, perform with Next Sequence/Clip Launch, and finish in Arranger.
- Record/edit automation and Q-Link gestures.
- Use LFO and envelope follower via Advanced Q-Links.
- Explain when Advanced CV is physically usable in your rig.
Sampling and library
- Move an MPC Sample project forward into Key 61/desktop without attempting the unsupported reverse path.
- Import, record, trim, fade, slice, tune, warp, reverse, and resample audio.
- Build and reload drum, keygroup, and clip programs.
- Use oscillator layers in drum/keygroup tracks.
- Stem-separate a source and derive genuinely new playable material.
- Find 20 useful SSD candidates in 15 minutes.
- Collect and restore a self-contained project.
Instruments
- Create three useful patches from init in Mini D, Jura, and Sub Factory.
- Deep-edit A/B sources and macros in all five NI instruments.
- Use each activated instrument as the main voice of a completed short piece.
- Print and re-chop at least one plugin phrase into a second-generation program.
Effects
- Use Utility for gain, mono, polarity, and width diagnosis.
- Explain corrective Visual EQ4 versus broad Stereophonic EQP.
- Explain Soft Clipper versus Tape Saturator.
- Explain fast Lo-Fly Dirt versus modular Flavor Pro.
- Explain Jura Chorus versus Tape Double Track versus Enhancer.
- Explain shared Reverb Pro versus creative Ether.
- Create controlled Tape Echo feedback and a safe performance exit.
- Build a Sprite patch module by module.
- Build Multiband Filterbank motion one band at a time.
- Perform restrained Flex Beat fills and salvage an abuse pass by resampling.
- Level-match every nonlinear or mastering comparison.
- Mono-check every widening/modulation chain.
Live and finish
- Capture guitar, bass, percussion/drums, horn/flute, sound effect, and vocal with project notes.
- Preserve original takes and comp/edit copies.
- Use shared returns to put live and sampled elements in one world.
- Export mix, instrumental, aligned stems, and reusable programs.
- Reopen the archive after restart and verify every dependency.
13. Hands-on lab cards
This chapter is the practical companion to the feature map. It is intentionally broader than the newest MPC 3 features: the goal is to make the MPC Key 61’s keyboard, pads, controls, I/O, storage, sampling, sequencing, mixing, and sound library familiar through short, repeatable exercises. It covers the major user-facing Key 61 features and every instrument, effect, and Pro feature named in this manual. Factory presets and menus may vary with installed content and MPC OS version.
Run these labs on the Key 61 in standalone mode unless Desktop Beta is stated. Start from a duplicate of a blank template. Save each exercise using MPC_LAB_<tool>_<YYYY-MM-DD>. Keep the project, one preset/program or track state, and one printed WAV when relevant. Add a short note about what you liked and where you might use it.
The goal is to reproduce the result, understand what changed, and decide whether it belongs in a real beat.
13.1 Key 61 hardware orientation
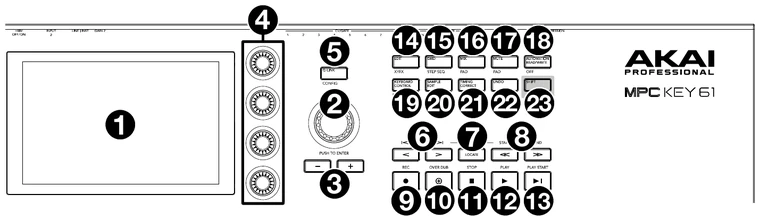
Keys, pads, and the main display
- Start an empty project and load a neutral Plugin track.
- Play the 61 semi-weighted keys at three velocities. Confirm that the sound responds to playing strength.
- Strike the 16 pads softly and hard. Change pad banks and confirm that the pad focus follows the selected bank.
- Touch the display to change a parameter, then use the main encoder to make the same change. Press the encoder to confirm a selection.
- Rename the track and save the project.
Goal: you can move between keys, pads, touchscreen, and encoder without losing the selected track or sound.
Pitch wheel, mod wheel, aftertouch, and touch strip
- Load a patch that responds clearly to pitch and modulation.
- Hold one key, move the pitch wheel, return it to center, and repeat with the mod wheel.
- Hold a key and gradually increase key pressure after the note begins. If the patch has no aftertouch response, load another patch or map aftertouch to a visible parameter.
- Press the Touch Strip/Config button to cycle its modes. Test Note Repeat, Pitch Bend, and Modulation where available.
- Hold Shift and press Touch Strip/Config to inspect its configuration; save one useful assignment.
Goal: you can state which control is changing pitch, modulation, note repetition, or a mapped parameter, and you can return each control to a neutral state.
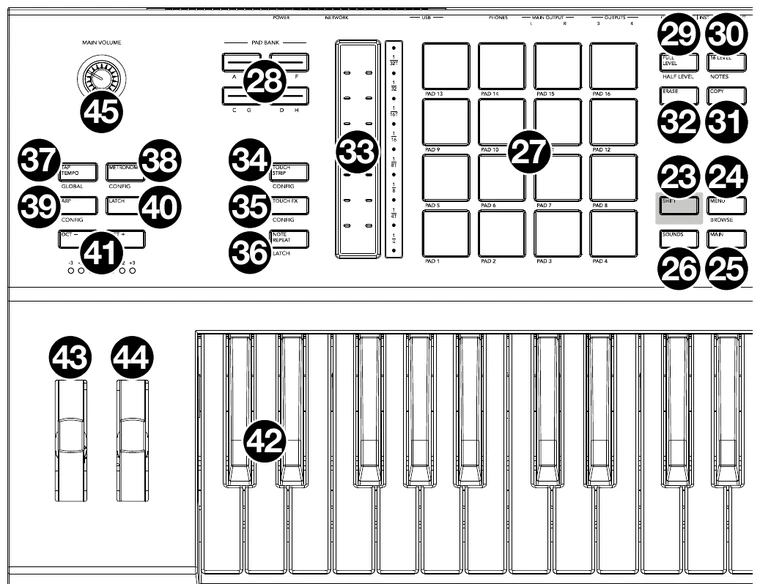
Q-Link knobs and hardware controls
- Load a synth or effect with several visible parameters.
- Touch each of the four Q-Link knobs and observe which parameter is selected.
- Record an eight-bar phrase while moving one Q-Link, then record a second pass with a narrower movement.
- Compare the two passes at matched loudness and save the better performance.
Goal: you can use a Q-Link as a musical performance control without making an accidental extreme jump.
Sustain, FS2, and expression pedals
- Connect a sustain pedal, then confirm that held notes continue after releasing the keys.
- Connect an FS2 footswitch and assign it to a function available in the current project.
- Connect an expression pedal and map it to a volume, filter, or effect-send parameter with a safe range.
- Record a short performance using keys, sustain, and expression; replay it without touching the screen.
Goal: each pedal performs the intended role and returns to a predictable value when released.
13.2 Key 61 audio, MIDI, CV, storage, and computer connections

Microphone, instrument, and line inputs
- Connect headphones before monitoring a microphone. For a condenser microphone, enable +48V only after the microphone is connected and the input is set correctly.
- Create an Audio track, choose Input 1 or 2, select the correct line/instrument setting, and arm the track.
- Record a 20-second level test. Adjust gain so the signal is healthy without clipping.
- Record a complete phrase, stop, turn monitoring off or to Auto, and listen back.
- Repeat with an instrument or line-level source, changing the input setting as appropriate.
Goal: microphone and instrument takes are clean, labeled, audible on playback, and not recorded with clipping or feedback.
Main, sub, and headphone outputs
- Connect the main outputs to speakers and set a low monitoring level before pressing Play.
- Connect the sub outputs to a second destination or leave them disconnected and inspect the routing options.
- Send a reference track to the main output and a metronome or cue-style source to the alternate output if your template supports it.
- Compare speaker and headphone monitoring at the same approximate loudness.
Goal: you know which output your mix, reference, and headphones use, and you can mute a destination without changing the project balance.
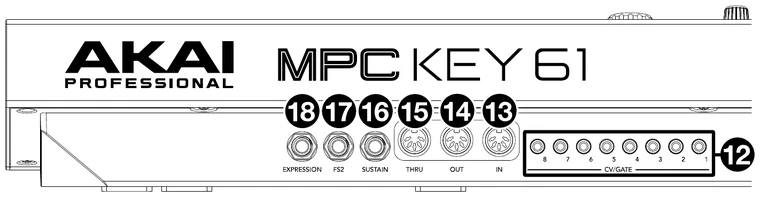
Five-pin MIDI In, Out, and Thru
- Connect an external MIDI keyboard to MIDI In and a hardware sound source to MIDI Out.
- Create a MIDI track, choose the Key 61 MIDI output port and the receiving channel, and play a test note.
- Record four bars and change the external sound source’s patch without changing the recorded MIDI.
- Enable MIDI Thru only when you want incoming MIDI forwarded; test for duplicate notes before leaving it enabled.
Goal: you can identify the input, output, channel, and Thru state and hear one note rather than an unintended MIDI loop.
CV/Gate outputs
- Connect one Key 61 CV/Gate pair to an external modular or CV-capable synth.
- Create a CV track and assign pitch CV and Gate to the destination’s required outputs.
- Play a short sequence, then add one modulation output to filter or another destination.
- Record the output map and the destination’s expected voltage/range in
Project_Notes.md.
Goal: the external device receives pitch and Gate consistently, and you can identify all connected outputs. The Key 61’s CV outputs use a 0–5V range and can be used simultaneously.
USB devices and computer/controller mode
- Connect a class-compliant USB MIDI controller or storage device to a USB-A port and confirm it appears in the appropriate settings or Browser view.
- Connect the Key 61 to the Mac with USB-B and open the desktop software.
- Test controller mode with a new project before opening an important project.
- Save a project on the external SSD or SATA drive, then disconnect and reopen it from the same drive.
Goal: you know which connection is carrying MIDI, which is carrying files, and which project location is being used. Do not assume the Key 61’s internal drive mounts directly to the Mac; access it through the Key 61’s Browser and storage workflow.
USB and SATA storage
- Connect an exFAT-formatted external drive and confirm it appears in Browser.
- Create
00_INBOX,04_MPC_PROJECTS, and08_EXPORTSon the drive. - Save a test project to
04_MPC_PROJECTS, close it, and reopen it from the drive. - If you use the internal SATA bay, power the Key 61 off before connecting or disconnecting the drive. Never use the internal factory-content area as the only copy of a project.
Goal: you can locate a project after power cycling and can explain where the project file, project data, samples, and exports live.
Wi-Fi, Bluetooth, and Ableton Link
- Connect the Key 61 to a trusted Wi-Fi network and check for an available MPC OS update without installing it during a project.
- Pair one supported Bluetooth device, then test audio or MIDI only if the device is intended for that role.
- Enable Ableton Link on the Key 61 and one other Link-capable device on the same network.
- Start and stop from each device, change tempo, and then disable Link before saving the project.
Goal: you can identify which connection is being used for update, Bluetooth, or Link synchronization and can leave the project in a predictable clock state.
13.3 Core MPC workflow labs
Browser, Sounds mode, and content activation
- Press Sounds and browse the installed instruments and presets.
- Load one preset, favorite it if the current browser supports favorites, and save a copy with a descriptive name.
- Open Preferences → Activations and confirm which content is activated, available to download, or missing.
- Do not download a large content set during a production session; choose the intended storage drive first.
Goal: you can distinguish an installed preset, a product that still needs installation, and a product that is unavailable on the account.
Drum program, recording, 16 Levels, Note Repeat, and Explode
- Create a Drum track and load a kit.
- Record kick, snare, hats, and percussion for four bars.
- Use 16 Levels on a snare or hat to record a controlled velocity or tuning variation.
- Use Note Repeat for a short hat or percussion fill, then turn it off before recording the next pass.
- Tap the track’s pencil/edit menu and select Explode Track. Mute the original only after confirming the separated tracks are correct.
Goal: you can make a pocket, add a controlled variation, and separate kit parts without losing the original performance.
Pad Perform: scales, chords, and note repeat
- Select a Plugin or Keygroup track and open Pad Perform.
- Choose Chromatic and play a scale across the pads. Change the root note and octave, then return to the original setting.
- Choose Chords, select a chord type, and record a four-bar progression.
- Change the chord voicing or scale without changing the drum track, then record a contrasting hook pass.
- Use Note Repeat for one short fill and turn it off before leaving Pad Perform.
Goal: you can use the pads as a playable harmonic or rhythmic instrument, return to a known key/scale, and explain whether the recorded result is MIDI notes or an audio print.
Keygroup and sampled instruments
- Load a sample and create or load a Keygroup program.
- Play the same sample in three keyboard registers and adjust tuning, envelope, and filter.
- Add a second layer only when it has a clear role such as attack, body, or noise.
- If MPC Oscillator Content is installed, switch one layer from Sample to Oscillator and compare it with the original sample.
Goal: you can build a playable bass or melodic part and save it with its required assets.
Plugin tracks and program saving
- Create a Plugin track and load an instrument from Chapter 7.
- Record an eight-bar phrase with a clear start and ending.
- Bypass internal effects, change one macro, and record a second pass.
- Save the best track state and write down whether the sound remains editable or should be printed.
Goal: you can recall the sound and explain which part of the performance came from MIDI and which came from control movement.
Audio tracks and resampling
- Create an Audio track and record a complete guitar, vocal, horn, or live-bass phrase.
- Make an edit copy before trimming or comping.
- Use Resample on a short effect or sequence only after saving the editable source.
- Place the resample beside the source, mute the source, and compare the committed result.
Goal: you can recover the clean take and identify the exact moment where the sound became printed audio.
Sequences, Next Sequence, Song, and Arranger
- Create four contrasting sequences:
INTRO,VERSE,HOOK, andBREAK. - Use Next Sequence to audition two different orders without editing the underlying material.
- Convert the chosen order into Song or Arranger form.
- Edit the complete beginning, escalation, contrast, and ending in Arranger.
Goal: you can explain whether you are discovering sections, performing their order, or committing the final timeline.
Grid, Track Edit, Sample Edit, mixer, mute, solo, and automation
- Record a four-bar drum pattern and open Grid to move one note, change one velocity, and shorten one note.
- Open Track Edit to inspect the sound source, layers, envelopes, and Q-Link assignments.
- Open Sample Edit to trim, fade, tune, reverse, and audition a copy of a sample.
- Open Channel Mixer and create one bus, one return, and one automation ride.
- Replay the result with mute, solo, and automation write/read states checked.
Goal: you can edit time, sound, audio, balance, and movement without confusing a destructive sample edit with a MIDI edit.
13.4 MPC Sample → Key 61 handoff
- On MPC Sample, make a new project and save it to microSD using Shift + Pad 16 (Project) → Save Project.
- Record one source, trim it, make no more than eight chops, and record a two-bar idea.
- Choose SD Card Access, connect USB-C to the Mac, and copy the complete
.XPJplus[ProjectData]folder to the SSD. - Safely eject the card, open the copied project on the Key 61, and immediately use Save As into a new project folder.
- Add one Key 61 instrument without replacing the original sample and reopen the saved project.
Goal: the project reopens with samples and chops intact, the original remains unchanged, and the handoff notes identify the source and first musical decision.
13.5 Pro-feature labs
Super Warp Algorithm
- Load a four-bar melodic loop and duplicate the track so the source remains untouched.
- Open the warp/time-stretch controls and choose Super. The default is under Menu → Preferences → Audio/Export → Audio Warp and BPM Detect.
- Make 75%, 100%, and 130% tempo versions, plus −5 and +7 semitone versions.
- Level-match the results and print only the two most useful.
Goal: you can name where Super improved the source and where ordinary chopping was better. Super is standalone-only in the current Pro Pack setup.
Advanced Q-Links
- Load a pad or texture and open Q-Link Edit for the selected track.
- Assign one Q-Link to an LFO and another to an envelope follower, with one target each.
- Set a neutral point, safe minimum, and expressive maximum.
- Record eight bars, replay them, and narrow the range until the source remains identifiable.
Goal: you can demonstrate cause and effect without touching the screen and reset both controls to neutral.
Advanced CV
- Create a CV track and connect one Key 61 CV/Gate pair to an external destination.
- Assign one Advanced CV envelope to pitch or filter movement.
- Add one synced LFO and compare phase-reset and free-running behavior.
- Add a stepper only after the slow movement works; save the output map.
Goal: the external sound follows the intended clock and you can identify every modulation source left enabled.
Clip Launch
- On standalone MPC 3, create clips for
INTRO,POCKET,LIFT, andBREAK. - Set launch quantization so clips change on musical boundaries.
- Add one follow action and leave the final transition manual.
- Perform 32 bars, then edit the resulting arrangement so the form can play without improvisation.
Goal: you can perform two forms from one clip set and explain the follow action. Clip Launch may be unavailable in MPC 3 Desktop Beta.
MPC Stem Separation
- Use an original, licensed, or private-study source and save the source project first.
- Open Sample Edit, locate the Stems function, and generate drums, bass, vocals, and other.
- Solo each result, trim obvious artifacts, and create one new drum, keygroup, or audio part.
- Compare it with the original in mono and in the full beat; do not assume forensic isolation.
Goal: you have a genuinely new musical part, the untouched source, and a note stating whether the material is cleared for release.
13.6 Instrument labs
For each instrument, use a blank Plugin track, start from an init patch when available, and save an eight-bar example.
Mini D
- Initialize a patch and use one oscillator for a mono bass.
- Adjust filter cutoff and amp release until the kick has space.
- Add a second oscillator only for upper harmonics, then compare in mono.
- Save
WB MiniD Clean Bassand record eight bars.
Goal: the bass is in tune, the kick remains readable, and the sound is identifiable with internal effects bypassed.
Jura
- Initialize a patch and build a short comp from DCO/sub balance, filter, and envelope.
- Compare Chorus I, Chorus II, and both at the same Mix level.
- Save a bass, comp, and pad variation from the same starting idea.
Goal: the bass survives mono and the pad remains useful with chorus bypassed.
Sub Factory
- Start with one wavetable or sine-like source and tune the root note.
- Set note length and glide before adding harmonics.
- Add the sample engine for attack or texture, then add drive for small-speaker translation.
- Save a clean sub, controlled 808, and short pluck.
Goal: you can identify sub, attack, and width roles without widening the fundamental.
Analog Dreams
- Choose a two-layer preset and solo A, then B.
- Set the balance, shorten the amp release, and reduce built-in space.
- Assign one macro to layer balance or brightness and record a hook movement.
- Save dry verse, moving hook, and printed transition versions.
Goal: each version has a different arrangement job.
Cloud Supply
- Choose a pad or pluck and inspect both sound-source layers.
- Remove low-mid fog with layer balance and envelopes before adding EQ.
- Reduce release and reverb until the part can make a rhythm.
- Automate brightness into a chorus and save a four-bar texture.
Goal: the texture enters and leaves without masking vocal, bass, or snare.
Homage
- Choose a grainy melodic preset and inspect layers A/B plus the macro controls available in the MPC Edition.
- Create a short phrase on the MPC track; do not assume the desktop Play Series sequencer is present.
- Automate or perform one macro movement, record or resample the result, and chop it to pads.
- Build a new eight-bar statement from the chopped result.
Goal: the second-generation program works without the original sequencer pattern.
Nacht
- Choose an aggressive bass, pad, or effect preset.
- Shorten the sequence and remove notes that force a four-on-the-floor feel.
- Derive one impact, one background texture, and one playable lead.
- Place them against dry drums and print only the structural transition.
Goal: Nacht supplies contrast without becoming continuous wallpaper.
Sway
- Choose a keys, guitar, or pad sound and play an eight-bar progression with two inversions.
- Reduce ambience and adjust layer balance before changing presets.
- Map one macro to a controlled verse-to-hook change.
- Save verse and hook variants and record both.
Goal: the harmony remains clear and the variants differ by musical role.
13.7 Effect and utility labs
For each effect, first save a bypassed reference, then insert the effect, level-match the output, and save a preset only after listening in the full arrangement.
AIR Utility
- Insert Utility on a stereo loop and save
UTILITY_REF. - Check gain, balance, mono, polarity, and width one at a time.
- Put it before a saturator to set input drive, then after the saturator to match output.
- Save neutral
GAIN TRIMandMONO CHECKstates.
Goal: you can identify whether a change came from level, polarity, mono summing, or width.
AIR Visual EQ4
- Insert Visual EQ4 on a loop with one known resonance or masking problem.
- Use a temporary narrow boost to find it, turn the move into the smallest useful cut, and match level.
- Make a second broad tonal version without trying to flatten the analyzer.
Goal: you can describe the problem before touching EQ and the source still sounds intentional.
AIR Stereophonic EQP
- Insert EQP on a music bus with bands neutral.
- Make one broad low or high change, then test Tube Warmth separately.
- Compare Stereo and Mid/Side modes at matched loudness.
- Save a subtle bus preset and a colored sound-design preset.
Goal: you can explain why EQP is being used instead of Visual EQ4.
AIR Soft Clipper
- Duplicate a kick or drum bus and insert Soft Clipper on the duplicate.
- Increase Drive until the attack changes, then reduce it to the smallest useful amount.
- Use Post Level and Mix to match bypass; test Stereo Link and True Peak/anti-alias options if present.
- Print clean, subtle, and obvious versions.
Goal: you hear the peak-shape change at matched loudness without harsh hats.
AIR Tape Saturator
- Test Tape Saturator on drums, bass, and vocal or horn separately.
- Compare the four models at low drive and choose tape speed by tone.
- Add wow, flutter, dropout, or noise only on a duplicate print.
- Save
CLEAN GLUE,DRUM DENSITY, andBROKEN PRINT.
Goal: each preset has one job and the master bus carries no unnecessary instability.
Lo-Fly Dirt
- Process the same break through all seven modes and label each print.
- Level-match and note bandwidth, transient, and noise differences.
- Blend one mode beneath the clean break instead of replacing the source.
- Keep only three modes with distinct musical jobs.
Goal: you can choose a mode by result before looking at its name.
AIR Flavor Pro
- Insert Flavor Pro on a duplicate with all modules bypassed.
- Add wobble/flutter, saturation, sample/bit reduction, vinyl, drift/dropouts, and timbre one at a time.
- Automate or print random-feeling events so the source remains recoverable.
- Save
SUBTLE AGE,SAMPLER MEMORY, andRADIO INTROwith WAV prints.
Goal: you can name the module responsible for each audible change.
AIR Jura Chorus
- Test Chorus I, Chorus II, and both on mono keys, guitar, bass upper harmonics, and vocal.
- Keep the Mix level comparable between tests.
- Narrow or filter the source if the center weakens; do not use it on the sub.
- Save one mono-safe preset and one wide effect preset.
Goal: the useful width remains when the track is summed to mono.
AIR Tape Double Track
- Insert Tape Double Track on a mono vocal or guitar and keep the source centered.
- Set a low double level, then explore modulation shape and varispeed before changing pan.
- Compare it with a real second take if one exists.
- Test Bass Mono/Solo Bass on a bass source and save a hook preset plus a psychedelic print.
Goal: you can distinguish believable double, chorus-like color, and special effect.
AIR Tape Echo
- Put Tape Echo on a return and send one vocal, horn, or melody phrase into it.
- Choose a head combination and sync it to tempo.
- Filter repeats, automate the send at the phrase end, and lower feedback before buildup.
- Save
SLAP,PREMIER THROW, andDUB FEEDBACK; print the feedback pass.
Goal: the echo answers the phrase without masking the next one, and you have an emergency bypass.
AIR Reverb Pro
- Create
ROOM SHORTandMUSIC LONGreturns. - Send drums, vocal, guitar, horn, and flute one at a time.
- Set pre-delay and filtering so attacks remain direct and low end stays controlled.
- Use no more than four instances on the Key 61’s first-generation standalone hardware; print one long tail.
Goal: the sources feel like one world and the groove remains forward.
AIR Ether
- Send one vocal syllable, breath, sample fragment, or guitar harmonic to Ether at 100% wet.
- Change one spatial or spectral control at a time and filter the return into its own register.
- Automate the send at a transition and print the tail.
- Reverse or chop the tail into a playable pad, riser, or impact.
Goal: one focal transformation is clear and the arrangement is not submerged.
AIR Sprite
- Insert Sprite on a duplicate and bypass all modules.
- Add distortion, one modulation slot, pitch shift if needed, delay, and reverb in that order.
- Set input/output EQ and width last; keep the five macros within safe ranges.
- Save two-module, four-module, and full versions, then print the one that earns its place.
Goal: you can remove a module and explain exactly what musical function disappears.
Flex Beat
- Create a Drum or Plugin track and record MIDI into the arrangement/grid; Flex Beat needs recorded activity before it applies effects.
- Load Flex Beat and choose one of the 16 FX slots. With Init, avoid the empty first slot and choose an active slot.
- Press Play or Play Start and listen to the effect against the recorded rhythm.
- Use four events across 32 bars, print the best pass, and chop four useful accidents.
Goal: you can explain the full MPC FX-player workflow separately from MPC Sample’s pad-selected Flex Beat mode.
AIR Multiband Filterbank
- Insert Filterbank on a full loop and solo each of its three bands.
- Set crossovers around low foundation, sample body, and air.
- Add drive or envelope following to one band only, then automate one sweep.
- Print an isolated-band result and re-chop it into a new program.
Goal: the motion is intentional without all three bands resonating at once.
AIR Stereophonic Enhancer
- Put Enhancer on a music or mix bus after balance is stable.
- Start with subtle Sub, Glue, Harmonics, and Air changes; match loudness with compensation or output trim.
- Compare stereo, mono, headphones, and a small speaker.
- Save bypass, subtle, and obvious versions and blind-test them in the full arrangement.
Goal: the subtle version improves depth or focus without weakening center, snare, or bass.
13.8 Live capture and finish
- Create named Audio tracks for guitar, bass, percussion, horn/flute, vocal, and found sound.
- Record a level test, then a complete musical pass before editing details.
- Preserve the original take, make comp/edit copies, and record instrument, player, input, tuning, tempo, and take number in
Project_Notes.md. - Route one short room return and one creative throw return; print only the moments that become part of the arrangement.
- Export mix, instrumental, aligned stems, and a self-contained project. Reopen it after restarting the Key 61 or desktop software.
Goal: you can identify what was recorded, edited, printed, and left changeable six months later.
Optional further reading
Akai and MPC documentation
- Akai MPC manuals
- MPC 3.9 Release Notes
- MPC 3 Desktop Public Beta FAQ
- MPC Software 3.9 Desktop Beta User Guide
- MPC 3 FAQ and supported standalone hardware
- MPC Key 61 FAQ and hardware specifications
- MPC internal-drive access
- MPC program types and loading
- Exploding drum kits into individual tracks
- MPC Key 61 Quickstart Guide
- MPC Sample FAQ
- MPC Sample online user guide
- Exporting MPC Sample projects through MPC 3 for stems
- MPC Pro Pack
- MPC Stem Separation FAQ
- Using keys and pads simultaneously
- Humanizing MPC tracks
- Plugin installation and activation
- Why some plugins are not available on every MPC platform
Instrument documentation
Effect documentation
- Flavor Pro
- Ether and Sprite MPC FAQ, including standalone instance guidance
- Sprite
- Understanding Flex Beat
- Jura Chorus
- Soft Clipper
- Multiband Filterbank
- Stereophonic bundle: Enhancer and EQP
- Stereophonic EQP
- Tape Double Track
- Tape Echo
- Tape Saturator
- Tape Effects Collection walkthrough
- Lo-Fly Dirt
Final operating principle
None of this matters sitting unused in a menu. The point was never to own more capability—it was to finally use what’s already here.
The setup is already deep enough. Mastery comes from reducing choices at the moment of creation, and expanding them only after an idea has earned it:
Capture the pocket on Key 61—or on MPC Sample first when the idea can’t wait. Preserve the source. Develop and perform on Key 61. Print what becomes identity. Archive so the beat can come back years later.
Then go finish something.